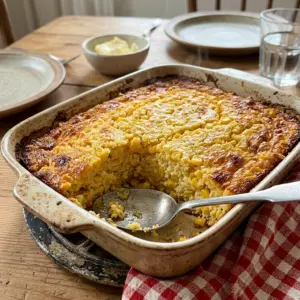

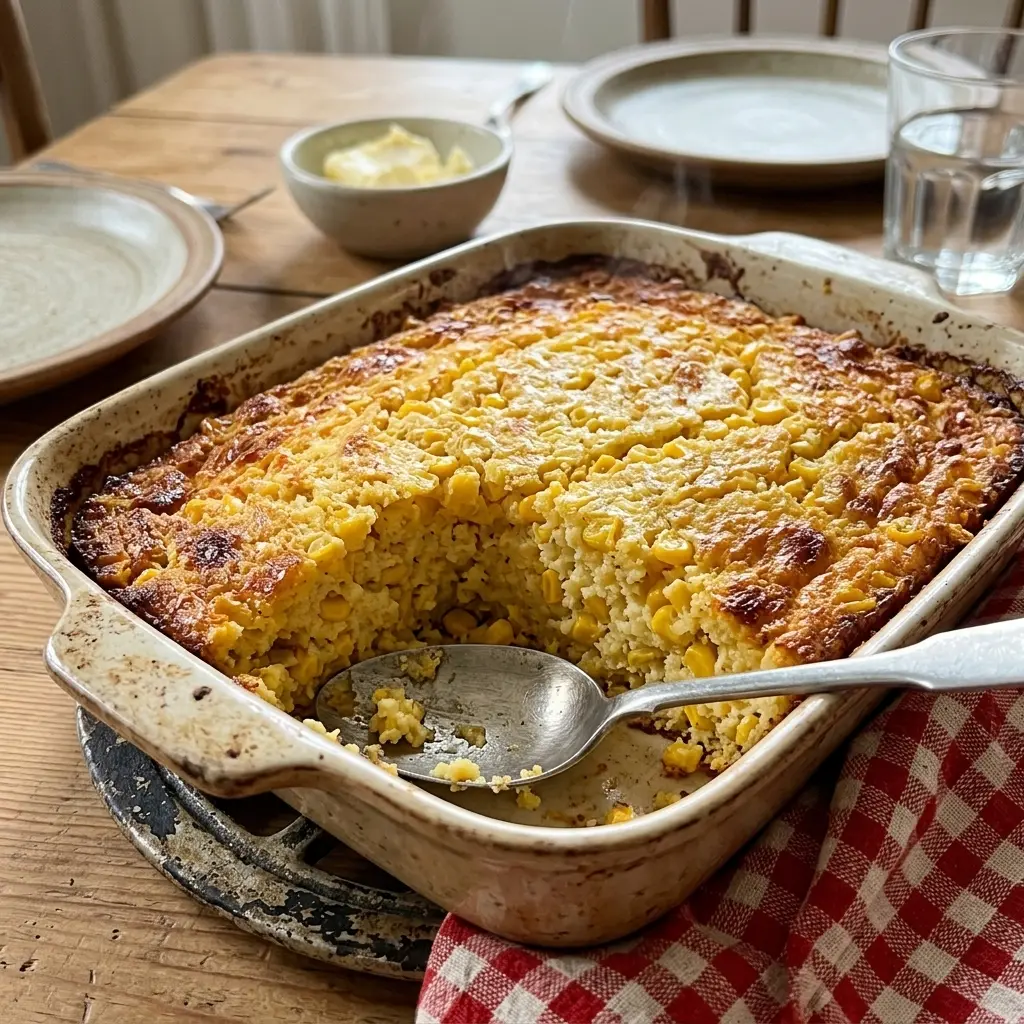
If there is one dish that seems to appear on nearly every Midwestern potluck table, holiday spread, and Sunday night supper, it is a good old corn casserole — and this old-fashioned Jiffy corn casserole is the version that never lets anyone down. Built on the back of one small blue box of Jiffy corn muffin mix, a couple of cans of corn, and a generous scoop of sour cream, it comes together in a single bowl in about ten minutes and then hands all of the real work over to the oven. What comes out is a casserole with a golden, lightly set top, a creamy custard-like interior, and a sweet, buttery corn flavor that sits beautifully next to roast chicken, baked ham, or a holiday turkey.
Part of the reason this casserole has stuck around for so long is its honesty. There is nothing tricky here, no tempering, no folding, no resting dough. You open a can, dump everything into one bowl, stir, and bake. It is the kind of recipe that first-time cooks can make on their own and that experienced cooks keep coming back to on the busiest nights of the year, because it feeds a crowd without demanding your attention while the rest of the meal gets finished.
Why You’ll Love This Recipe
- A handful of pantry ingredients — one box of Jiffy corn muffin mix, two cans of corn, sour cream, butter, and eggs.
- One bowl, one dish — the whole casserole is mixed in a single mixing bowl and baked in the dish it’s served in.
- Feeds 6 to 8 from one 8×8 or 9×9 pan, which makes it a natural for family dinners and potlucks.
- Make-ahead friendly — it can be assembled a day ahead, refrigerated, and baked just before guests arrive.
- A crowd-pleasing texture — creamy and custard-like inside with a gently golden top.
- Flexible — a cup of sharp cheddar is a very common addition, and other mix-ins are easy to work in.
- Comforting and familiar — the kind of side dish that makes a regular weeknight dinner feel like a special occasion.
What Does It Taste Like?
This casserole is all about sweet, buttery corn flavor with a gentle savory backbone. The Jiffy corn muffin mix gives it a tender, slightly crumbly structure and a mild cornbread sweetness, while the creamed corn melts into the batter and keeps the interior soft and spoonable. The whole kernel corn adds little pops of texture so the casserole isn’t completely uniform — you get both creamy bites and distinct kernels. The sour cream is the quiet hero: it adds a faint tang that keeps the sweetness from tipping into dessert territory, and it contributes to the custard-like set. The melted butter rounds everything out and helps the top turn a appealing golden as it bakes. If you add the optional sharp cheddar, you get a richer, more savory casserole with small pockets of melted cheese throughout — closer to the corn-and-cheese casseroles you see at church suppers. Either way, the finish is comforting, mild enough for kids, and interesting enough that adults go back for seconds.
Recipe Overview
- Prep Time: About 10 minutes (general guidance — this is a simple mix-and-bake casserole)
- Cook Time: 45 minutes to 1 hour
- Bake Temperature: 350°F (175°C)
- Total Time: About 1 hour to 1 hour 10 minutes, plus 5–10 minutes of rest
- Yield: 6–8 servings
- Difficulty: Easy
- Baking Dish: 8×8-inch or 9×9-inch square pan, or a small casserole dish
Ingredients
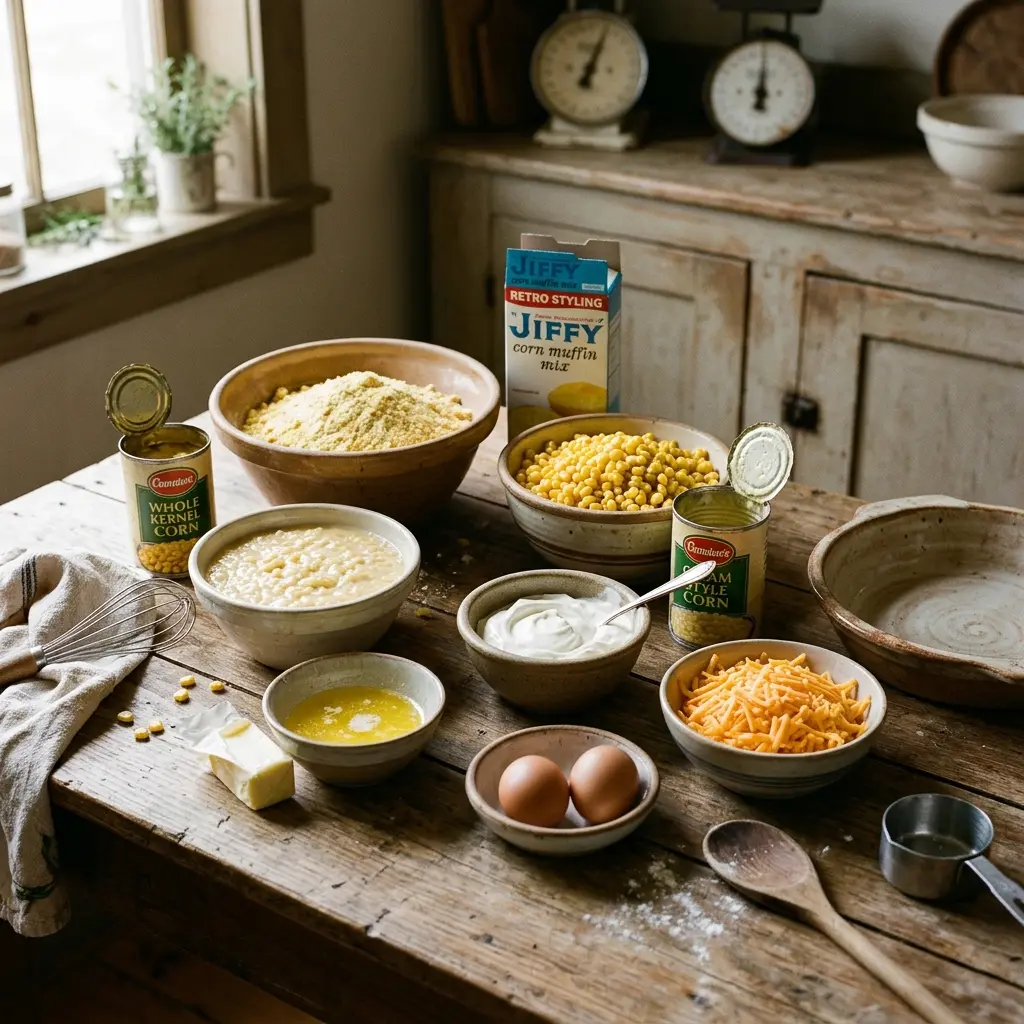
- 1 box (8.5 oz) Jiffy Corn Muffin Mix — the small blue box
- 1 can (15 oz) creamed corn
- 1 can (15 oz) whole kernel corn, drained
- 1 cup sour cream
- ½ cup (1 stick) unsalted butter, melted
- 2 large eggs, beaten
- 1 cup shredded sharp cheddar cheese (optional, but very common)
- Salt and pepper to taste
Ingredient Notes
Jiffy Corn Muffin Mix: The recipe calls for the classic small blue box, which weighs 8.5 ounces and makes roughly one cup of mix. This single box is what thickens the casserole and gives it its tender cornbread-like structure — don’t swap in a larger box or a different flavor (like honey or jalapeño corn muffin mix) without expecting a noticeably different result. Keep a couple of boxes in the pantry and this casserole is always within reach.
Creamed corn: Sometimes labeled “cream-style corn,” this is the same product — whole kernel corn suspended in a thick, milky corn liquid. It dissolves into the batter during baking and is responsible for much of the casserole’s creamy interior. Don’t drain it; that liquid is part of the texture. If you only have whole kernel corn on hand, this isn’t the same substitution — creamed corn and drained kernel corn behave very differently here.
Whole kernel corn: Drain this can thoroughly before adding it. The recipe works with the kernels for texture, but the liquid in the can adds more moisture than the casserole needs and can leave it watery. Some family versions skip the draining — the trade-off is a softer, wetter result that needs a longer bake to set.
Sour cream: Full-fat sour cream gives the best texture, adding both tang and a creamy richness that keeps the casserole moist. It also helps bind everything into a custard-like set as it bakes. If you only have light sour cream, the casserole will still work, but the interior will be a touch less luscious.
Butter: Use unsalted butter so you control the seasoning, and melt it before mixing so it incorporates evenly. The butter contributes flavor and helps the top brown and set into a light crust.
Eggs: Two beaten eggs help bind the casserole and give it structure. Interestingly, some older versions of this recipe leave the eggs out entirely — the casserole still bakes up, just with a slightly softer, more spoonable set. If you’re adapting the recipe for an egg-free table, it can be done, but the texture changes.
Cheddar cheese: Sharp cheddar is the classic choice because its flavor stands up to the sweet corn. It’s marked optional in the source recipe, but it’s such a common addition that many families consider it standard. Shred it yourself from a block for the smoothest melt — pre-shredded bags are coated to resist clumping, which can leave the cheese a little grainy.
Kitchen Tools You’ll Need
- 8×8-inch or 9×9-inch square baking dish (or a small casserole dish of similar size)
- Large mixing bowl
- Can opener
- Colander or strainer (for draining the kernel corn)
- Whisk or sturdy spoon
- Measuring cup
- Butter or cooking spray for greasing the dish
- Aluminum foil (optional, for covering if the top browns too fast)
- Wire cooling rack or towel (to protect the counter under the hot dish)
Substitutions and Variations
The recipe below is the classic version. These ideas are variations on it, not part of the original — treat them as your own spin once you’ve made the casserole as written at least once.
Sour cream swap: Plain whole-milk yogurt can stand in for the sour cream cup for cup. It brings a similar tang and thickness, though the finished casserole will be slightly less rich. Avoid low-fat or nonfat versions here — they don’t hold the same creamy texture in the oven.
Cheese options: If sharp cheddar isn’t your style, Monterey Jack melts beautifully and tastes a little milder, and a small amount of crumbled bacon stirred in alongside it turns this into a recognizable supper-club favorite. You can also simply leave the cheese out — the casserole is completely at home without it.
Add-ins from family kitchens: Diced jalapeños (fresh or pickled, seeds removed for less heat), crumbled cooked bacon, or a thawed, well-drained 10-ounce box of frozen chopped broccoli are all common additions. Add-ins go in at the same folding step as the cheese, and each one pushes the dish a little further from the plain classic — which is, of course, the point.
No Jiffy mix on hand: Another brand of corn muffin or corn bread mix can sub in at the same volume, though the texture will differ slightly because Jiffy’s mix is formulated to stay tender. A from-scratch cornmeal batter is a bigger project and really a different recipe — worth doing someday, but not the weeknight swap.
Feeding a bigger crowd: For a 9×13-inch dish, double everything and expect the bake to run closer to the full hour, checking for doneness from 50 minutes on. A doubled batch in a larger pan bakes a little faster per inch of depth than you might expect, so start checking early.
How to Make Old-Fashioned Jiffy Corn Casserole

Step-by-Step Instructions
- Preheat and prepare the dish. Heat your oven to 350°F (175°C). Grease an 8×8-inch or 9×9-inch baking dish with butter or cooking spray — the casserole is moist enough that sticking is a real possibility, especially along the edges.
- Drain the kernel corn. Pour the whole kernel corn into a colander and shake it well. You want the kernels moist but not swimming in can liquid.
- Combine everything. In a large mixing bowl, add the Jiffy corn muffin mix, creamed corn, drained kernel corn, sour cream, melted butter, and beaten eggs. Stir until the mixture is well blended and no dry pockets of muffin mix remain.
- Fold in the cheese and season. If you’re using the sharp cheddar, fold it in now. Season the mixture with salt and pepper to taste, remembering that the mix, cheese, and creamed corn all bring some saltiness of their own — taste before you salt generously.
- Pour and smooth. Scrape the mixture into the prepared baking dish and spread it into an even layer with the back of a spoon or a spatula. An even layer bakes evenly.
- Bake. Put the dish in the oven and bake for 45 minutes to 1 hour, until the top is golden brown and the center is set. A knife inserted into the center should come out clean.
- Rest before serving. Let the casserole stand for 5 to 10 minutes before bringing it to the table. It will still be hot, but the interior firms enough to hold clean spoonfuls instead of slumping.
Tips for Success
- Drain the kernel corn thoroughly. This one step is the difference between a creamy casserole and a soupy one. Give the colander a few good shakes, and if the kernels still look wet, let them sit a minute longer.
- Soften the sour cream slightly. Cold sour cream straight from the fridge is stiff and can leave small tangy streaks in the batter. Letting it sit out for 15–20 minutes makes it fold in more evenly (general kitchen guidance).
- Stir until just blended. Once the dry mix is moistened, stop. Overworking the batter doesn’t improve anything and can make the texture denser.
- Start checking at 45 minutes. Ovens vary, and a golden top with a clean knife is your real target — the time range in the recipe is a guide, not a contract.
- Tent with foil if the top browns too fast. If the surface is deeply golden well before the center is set, lay a piece of foil loosely over the dish for the remainder of the bake.
- Let it rest. Cutting into a corn casserole straight out of the oven is like cutting into soft custard — it holds its shape much better after 5–10 minutes on the counter.
How to Know It’s Done
The two reliable indicators are color and set. The top should be golden brown — not pale, and not browned so deeply that the edges are crisping past pleasant. For the center, slip a knife in: it should come out clean, without wet batter clinging to it. The edges of the casserole will be firmer and slightly pulled away from the sides of the dish, while the very center may still have a gentle wobble as you move the dish — that’s fine, because carryover heat finishes the set during the rest. If the knife comes out with wet mixture, give it another 5 minutes and check again rather than pulling it early.
What to Serve With It
This casserole is a side dish through and through, and it pairs with almost anything that has a savory roast or gravy. Classic companions are roast chicken, pot roast, baked ham, and of course Thanksgiving turkey — where it holds its own beside stuffing and mashed potatoes. For a full comfort spread, serve it alongside Honey Butter Sweet Potato Cornbread or Melt-In-Your-Mouth Buttery Biscuits, and if you want a second corn dish on the table, Cream Cheese Corn Casserole is a richer, tangier cousin to this one. A simple green bean dish or a crisp salad keeps the plate balanced.
Storage Instructions
The source recipe’s make-ahead note is genuinely useful: you can assemble the casserole completely, cover the dish, and refrigerate it until you’re ready to bake. Add 5–10 extra minutes to the bake time when it goes into the oven cold, since the chilled mixture takes longer to heat through. For leftovers, general kitchen guidance is to let the casserole cool, then cover the dish or transfer the remaining portions to an airtight container and refrigerate — corn casserole keeps well for a few days this way and reheats nicely in the microwave or in a covered dish in a low oven, which keeps the top from drying out. Always reheat leftovers until they’re steaming hot in the center.
Freezing Instructions
As general guidance, this casserole freezes respectably both baked and unbaked. To freeze unbaked, assemble it in a freezer-safe dish, wrap it tightly with plastic wrap and then foil, label it, and freeze. To bake from frozen, thaw it overnight in the refrigerator (or add a generous amount of extra bake time from frozen, covered with foil for the first portion), and check doneness with the knife test. Baked leftovers freeze well too — cool them completely first, then wrap individual portions so you can thaw only what you need. Thaw frozen portions overnight in the refrigerator and reheat gently. Use frozen casserole within a couple of months for the best texture.
Common Mistakes to Avoid
- Not draining the kernel corn. Extra can liquid means a longer bake, a softer set, and a casserole that weeps a little on the plate.
- Overmixing the batter. Stir only until the dry mix disappears. Pounding away at the batter knocks the air out of it and makes the interior dense.
- Using the wrong pan size. A deeper dish means a longer, uneven bake; a shallower one can dry out before the center sets. Stick to the 8×8 or 9×9 the recipe is built around, or double it for a 9×13.
- Cutting too soon. The rest isn’t optional for neat serving — five to ten minutes lets the custard-like interior firm up.
- Overbaking. A casserole pulled when the knife comes out clean is creamy inside; one left in “to be sure” can come out dry around the edges. Check early and often near the end.
- Salting before tasting. Between the muffin mix, the cheese, and the creamed corn, there is already a fair amount of salt in the bowl. Season, taste, and then decide.
- Baking in a cold dish straight from the fridge when make-ahead. Remember the extra 5–10 minutes, or you’ll panic at the 45-minute mark when the center isn’t set yet.
About Jiffy Corn Casserole
The Jiffy brand of corn muffin mix has been a pantry staple in American households since the 1930s, when it was introduced by the Chelsea Milling Company in Chelsea, Michigan. The mix was designed to make tender corn muffins with almost no effort, and generations of home cooks quickly discovered it could do much more than muffins — stirred into soups, layered into fish dishes, and above all baked into casseroles. Corn casseroles themselves grew out of mid-century American home cooking, when canned goods and boxed mixes became everyday staples and “dish dinners” built around one baked pan became a fixture of church suppers, potlucks, and holiday tables, especially across the Midwest and the South.
This particular version — Jiffy mix, canned corn, sour cream, and butter — is the old-fashioned one that grandmothers passed down by the thousands, which is why you’ll find it under slightly different names (corn casserole, corn bake, creamed corn casserole, Jiffy corn pudding) in church cookbooks and recipe cards everywhere. What makes it endure isn’t nostalgia alone; it’s that the formula actually works. The boxed mix handles the structure and flavor base, the canned corn keeps it affordable and shelf-stable, and the sour cream gives it a homemade richness that belies how little effort is involved. In a era of elaborate recipes, a six-ingredient casserole that reliably pleases a full table is its own kind of wisdom.
Frequently Asked Questions
Can I make this without eggs?
Yes — some older versions of the recipe leave the eggs out entirely, and it still bakes up. The casserole will be a bit softer and more spoonable, with less of a firm custard set, and you may want to check it a few minutes early so it doesn’t dry out. It’s not an identical result, but it’s a workable one.
Can I use frozen corn instead of canned?
As a variation, yes — thaw the frozen corn completely and drain it very well so it doesn’t add extra liquid. You’ll lose the convenient shelf-stable aspect, but the flavor is actually a bit fresher. This is an adaptation, not part of the original recipe.
Why is my corn casserole watery?
Almost always it’s one of three things: the whole kernel corn wasn’t drained, the casserole was cut before it rested, or it came out of the oven before the center fully set. Drain the corn thoroughly, bake until a knife comes out clean, and let the dish stand 5–10 minutes before serving.
Can I assemble it the day before?
Yes — this is one of the recipe’s best features. Mix everything, pour it into the greased dish, cover, and refrigerate. When you’re ready, bake it as directed, adding 5–10 minutes since it starts cold. It’s a genuinely stress-free holiday side dish.
Can I freeze this casserole?
It freezes well as a general practice, both unbaked (assemble, wrap tightly, freeze, then bake from thawed or with extra time from frozen) and as baked leftovers in individual portions. Cool it completely before wrapping, and use it within a couple of months for the best texture.
Is Jiffy corn casserole gluten-free?
No — as written, it isn’t. The Jiffy corn muffin mix contains wheat flour, and the creamed corn may also contain flour-based thickening depending on the brand. A gluten-free version would require a different mix entirely and is a separate recipe.
Can I bake it in a 9×13 pan?
Yes, with a doubled batch — the same mixture spread across a 9×13 bakes thinner and faster per inch, so start checking for doneness around 50 minutes. Baking a single batch in a 9×13 gives you a very thin casserole that can dry out at the edges before the center sets.
What’s the difference between creamed corn and cream-style corn?
Nothing — they’re two names for the same canned product: whole kernel corn in a thick, milky corn liquid. Buy whichever label your store carries.
Conclusion
This old-fashioned Jiffy corn casserole is proof that a short ingredient list has never been a limitation. With one box of mix, two cans of corn, some sour cream, butter, and eggs, you get a golden-topped, creamy-centered side dish that tastes like it took all afternoon — and it’s the kind of familiar comfort that disappears first at any gathering. Make it as written, fold in some cheddar if you like it richer, and save your add-in experiments for once the classic version has earned its place at your table. Happy cooking!
More Delicious Recipes You’ll Love
- Irresistible Cream Cheese Corn Casserole (Easy 6-Ingredient Side!)
- Creamy Corn Bread (No Flour)
- Honey Butter Sweet Potato Cornbread
- Apple Bourbon Upside-Down Cornbread Recipe
- 7 Irresistibly Creamy Corn Muffins – The Ultimate Flourless Recipe You’ll Love
Save It for Later on Pinterest
Love this old-fashioned Jiffy corn casserole? Pin it to your holiday side dishes board and follow @PoulefRecipe on Pinterest for more easy crowd-pleasing recipes: pinterest.com/poulefrecipe
Made This Recipe? Tell Us!
Did you make this old-fashioned Jiffy corn casserole? We’d love to hear how it turned out! Did you stir in the sharp cheddar, add jalapeños or bacon, or make it ahead for a holiday table? Drop a comment below and share your version — and tell us what you served it alongside.
Print
Old-Fashioned Jiffy Corn Casserole
- Total Time: About 1 hour to 1 hour 10 minutes
- Yield: 6–8 servings 1x
Description
This old-fashioned Jiffy corn casserole is a creamy, golden-topped side dish made with one box of Jiffy corn muffin mix, creamed corn, whole kernel corn, sour cream, melted butter, and eggs. An easy potluck and holiday staple that serves 6 to 8.
Ingredients
1 box (8.5 oz) Jiffy Corn Muffin Mix (the small blue box)
1 can (15 oz) creamed corn
1 can (15 oz) whole kernel corn, drained
1 cup sour cream
1/2 cup (1 stick) unsalted butter, melted
2 large eggs, beaten
1 cup shredded sharp cheddar cheese (optional, but very common)
Salt and pepper to taste
Instructions
1. Preheat your oven to 350°F (175°C). Grease an 8×8-inch or 9×9-inch baking dish with butter or cooking spray.
2. Pour the whole kernel corn into a colander and shake it well to drain.
3. In a large mixing bowl, add the Jiffy corn muffin mix, creamed corn, drained kernel corn, sour cream, melted butter, and beaten eggs. Stir until the mixture is well blended and no dry pockets of muffin mix remain.
4. If using the sharp cheddar, fold it in now. Season the mixture with salt and pepper to taste, and taste before salting generously since the mix, cheese, and creamed corn all bring some saltiness.
5. Scrape the mixture into the prepared baking dish and spread it into an even layer with the back of a spoon or a spatula.
6. Bake for 45 minutes to 1 hour, until the top is golden brown and the center is set. A knife inserted into the center should come out clean.
7. Let the casserole stand for 5 to 10 minutes before bringing it to the table.
Notes
Drain the whole kernel corn thoroughly — extra can liquid means a longer bake and a softer set.
Let the sour cream sit out for 15-20 minutes so it folds in more evenly.
Stir only until the dry mix disappears; overworking the batter makes the interior dense.
Start checking for doneness at 45 minutes — a golden top and a clean knife are the real targets.
If the top browns too fast, tent the dish loosely with foil for the remainder of the bake.
Let the casserole rest 5-10 minutes before cutting so the interior firms up.
Make-ahead: assemble fully, cover, and refrigerate; bake as directed, adding 5-10 extra minutes since it starts cold.
Variations (not part of the original recipe): fold in 1 cup shredded sharp cheddar, diced jalapenos, crumbled cooked bacon, or a thawed, well-drained 10-oz box of frozen chopped broccoli.
- Prep Time: 10 minutes
- Cook Time: 45 minutes to 1 hour
- Category: Side Dish
- Method: Baking
- Cuisine: American
Table of Contents

Gianna Poulef
I’m Gianna Poulef from Poulef Recipes. I love sharing perfected dishes from my kitchen. I’m sure they’ll earn a spot in your heart. Let’s savor this journey together!.
Let’s be friends!