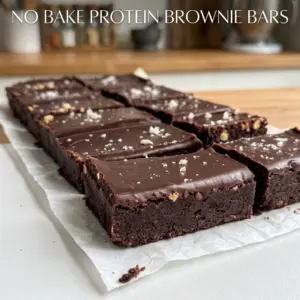


When you want something that tastes like a rich, fudgy brownie but comes together with no oven and no baking, these No Bake Protein Brownie Bars are the answer. A blended base of prunes and peanut butter gives them a naturally sweet, fudgy texture, while protein powder and cocoa powder turn them into a genuinely satisfying snack instead of just a dessert. Press them into a pan, top with melted chocolate and crushed peanuts, chill, and slice — no baking skills required.
Why You’ll Love This Recipe
- No oven needed — just a blender and a pan
- Naturally sweetened with prunes rather than refined sugar as the primary sweetener
- Rich, fudgy, brownie-like texture
- About 9 grams of protein per bar
- Ready in about 40 minutes, most of it hands-off chilling time
- Makes a generous batch of 12 bars for snacking all week
These bars are also easy to portion and store, which makes them a good option for meal prep. Once they’re sliced and chilled, they hold their shape well, so you can grab one straight from the fridge or freezer whenever you need a quick, protein-forward treat.
What Does It Taste Like?
These bars taste rich and fudgy, closer to a dense brownie than a dry protein bar. The prunes and peanut butter blend into a smooth, naturally sweet base, while the cocoa powder gives it a deep chocolate flavor. The melted chocolate topping adds a light snap, and the crushed peanuts on top bring a bit of salty crunch that balances the sweetness underneath.
Recipe Overview
- Prep Time: 10 minutes
- Chill Time: 30 minutes (or 15 minutes in the freezer)
- Total Time: 40 minutes
- Servings: 12 bars
Ingredients
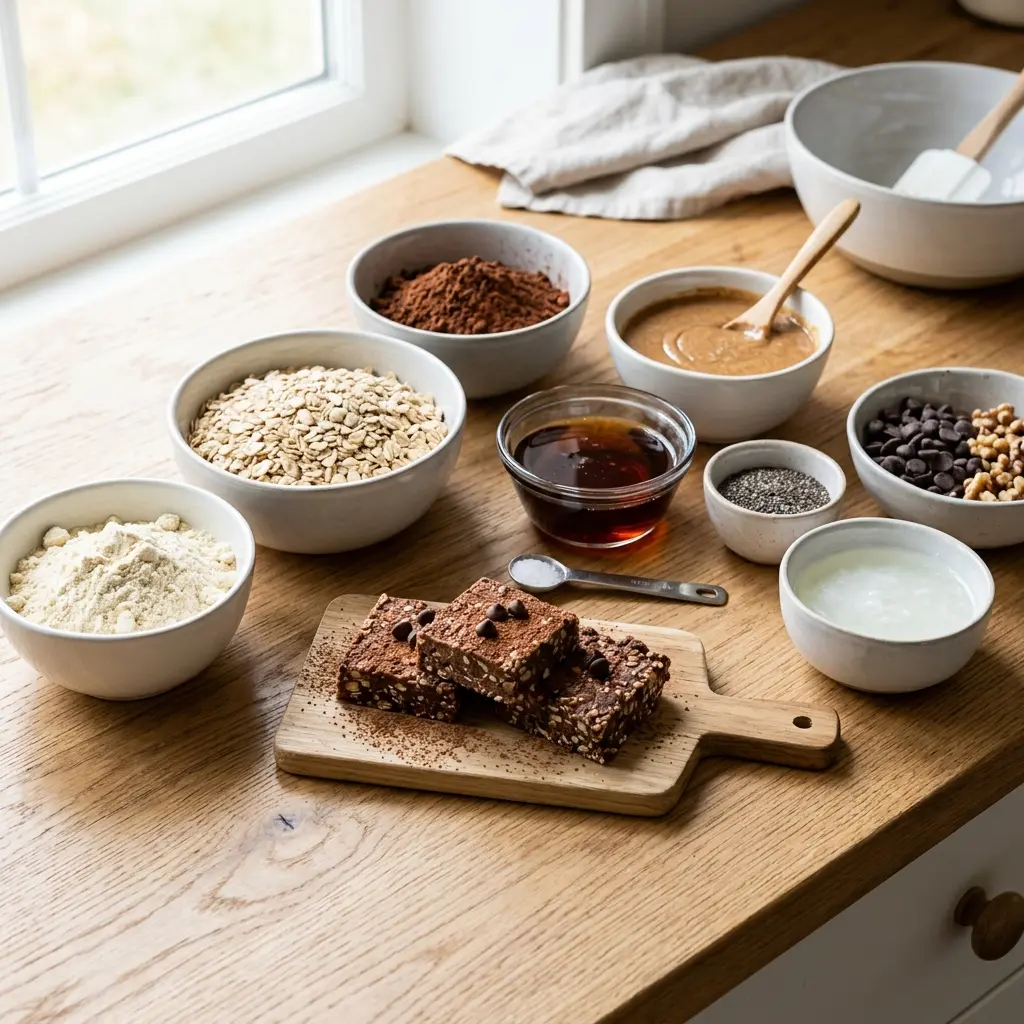
- 12 pitted California prunes
- 4 tablespoons hot water
- ½ cup natural peanut butter
- 1 teaspoon vanilla extract
- 2 tablespoons turbinado sugar (optional)
- ¼ teaspoon salt
- ¾ cup unsweetened protein powder
- ⅓ cup cocoa powder
- ¼ cup dairy-free chocolate chips
- ¼ cup chopped salted peanuts
Ingredient Notes
Prunes: Blended with hot water, prunes form the sticky, naturally sweet base that holds these bars together — much like dates do in many no-bake bar recipes.
Natural peanut butter: Adds richness, healthy fats, and helps bind the mixture. Using a natural, drippy peanut butter (rather than one with added stabilizers) blends more smoothly.
Unsweetened protein powder: The main protein boost in this recipe. Since it’s unsweetened, the turbinado sugar is there as an optional way to adjust sweetness to taste.
Cocoa powder: Gives the bars their deep chocolate, brownie-like flavor.
Turbinado sugar: Entirely optional — it’s there to boost sweetness if your protein powder or prunes don’t provide enough on their own.
Dairy-free chocolate chips: Melted into a thin topping layer that sets into a light chocolate shell over the bars.
Chopped salted peanuts: Pressed into the chocolate topping while it’s still soft, adding crunch and a salty contrast to the sweet base.
Kitchen Tools You’ll Need
- Food processor or high-powered blender
- Mixing bowl
- 8×8-inch pan
- Parchment paper
- Microwave-safe bowl, for melting the chocolate
Substitutions and Variations
These are optional ideas, not part of the original recipe:
- If the mixture is too thick to blend smoothly, the recipe suggests adding a little more water.
- If the mixture turns out too sticky, adding a bit more peanut flour or protein powder helps firm it up.
- Swap the chopped peanuts for another chopped nut, like almonds, if you prefer.
- Leave off the optional turbinado sugar entirely for a less sweet bar, especially if your protein powder is already sweetened.
How to Make the Recipe
This is a simple blend-and-press recipe: prunes, water, and peanut butter are pureed into a smooth base, then protein powder and cocoa powder are folded in by hand to form a thick, moldable dough. The dough is pressed into a lined pan, topped with melted chocolate and crushed peanuts, then chilled until firm enough to slice.
Step-by-Step Instructions
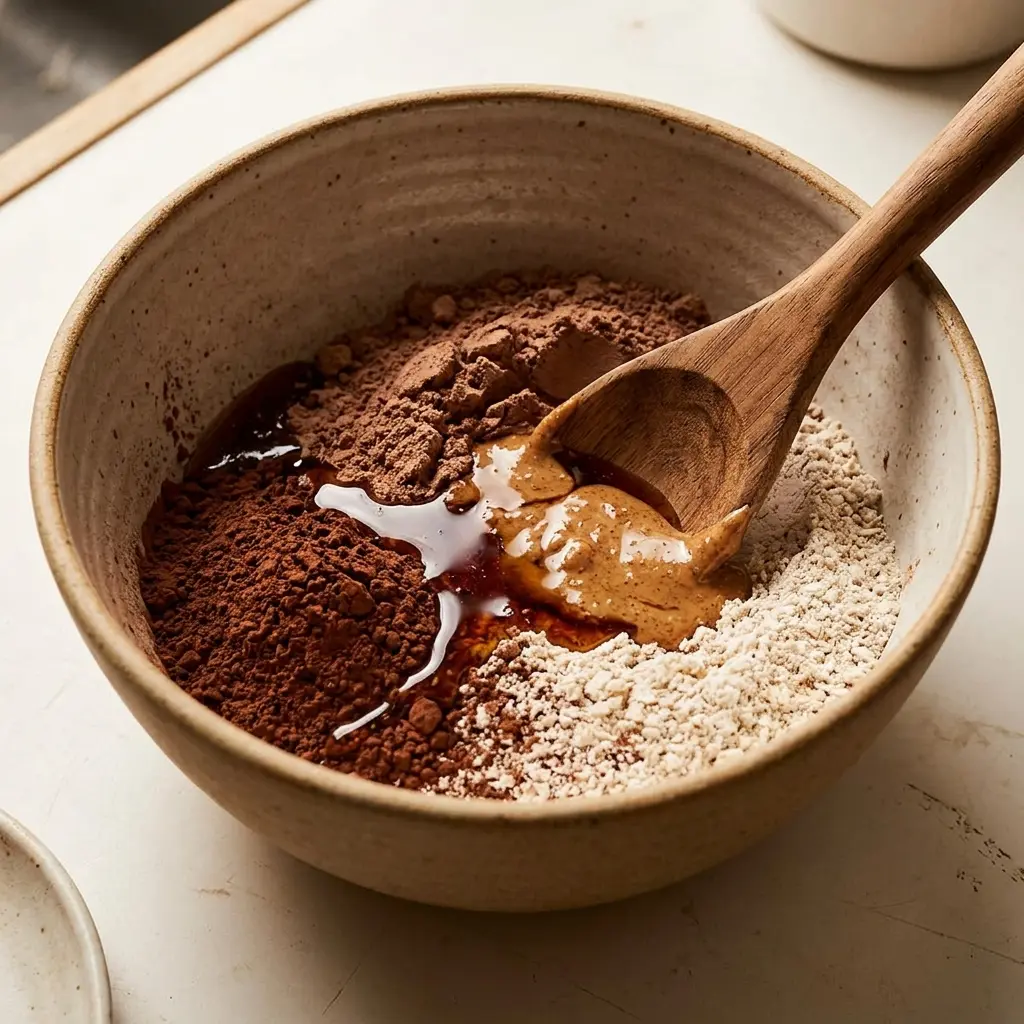
- Combine the prunes, hot water, and peanut butter in a blender; puree until smooth, scraping down the sides as needed.
- Add the vanilla, sugar (if using), and salt; puree until smooth.
- Transfer the mixture to a bowl; mix in the protein powder and cocoa powder until uniformly combined. Adjust the consistency by adding a little water if it’s too thick, or a bit more peanut flour or protein powder if it’s too sticky.
- Line an 8×8-inch pan with parchment paper. Press the dough firmly into the pan, using a second sheet of parchment on top to help even it out.
- Microwave the chocolate chips for 30–45 seconds until melted; spread a thin layer over the bars. Top with the crushed peanuts, pressing them gently into the chocolate.
- Refrigerate for 30 minutes (or freeze for 15 minutes) before slicing into 12 squares.
Tips for Success
- Scrape down the sides of the blender as you go so the prune and peanut butter base purees evenly.
- Adjust the dough’s consistency gradually — a little water or protein powder at a time — until it’s firm but still pliable.
- Use a second sheet of parchment paper on top of the dough to press it into an even, level layer.
- Let the chocolate topping set for the full chill time before slicing, so it doesn’t crack or smear.
- Use a sharp knife and wipe it clean between cuts for neater slices through the chocolate layer.
How to Know It’s Done
These bars don’t bake, so “doneness” simply means the chocolate topping has set and the bars are firm enough to hold their shape when sliced — about 30 minutes in the refrigerator or 15 minutes in the freezer.
What to Serve With It
These bars are a great grab-and-go snack on their own, or paired with a glass of milk for a more dessert-like treat. For more no-bake and protein-forward treats from Poulef, try our No-Bake Brownie Cookies or our No-Bake Greek Yogurt Peanut Butter Fudge Crunch Bars.
Storage Instructions
Store the bars in the refrigerator for up to 2 weeks. Keeping them chilled helps the chocolate topping and fudgy base hold their texture.
Freezing Instructions
These bars freeze well for up to 3 months. Store them in an airtight container, with parchment paper between layers to keep them from sticking together, and let them sit at room temperature for a few minutes before eating if you prefer a softer bite.
Common Mistakes
- Not scraping down the blender, which can leave the prune and peanut butter base unevenly pureed.
- Skipping the consistency adjustment step, which can leave the dough too sticky to press evenly into the pan.
- Slicing the bars before the chocolate topping has fully set, which can cause it to smear or crack.
- Using a protein powder with a very different texture than expected, which can throw off how much liquid or extra powder the dough needs.
Frequently Asked Questions
Do I have to use the optional turbinado sugar?
No, it’s listed as optional in the recipe — you can leave it out if you’d like a less sweet bar or if your protein powder is already sweetened.
Can I skip the chocolate topping?
The chocolate topping and crushed peanuts are part of the recipe as written, but you could serve the bars plain if you’d prefer; keep in mind this changes the finished look and flavor from the original recipe.
Why is my dough too sticky to press into the pan?
This usually means the mixture needs a bit more peanut flour or protein powder, as noted in the instructions, to firm it up before pressing.
How long do these bars keep?
Can I use a different protein powder flavor?
The recipe calls for an unsweetened protein powder, but a chocolate-flavored one can work too — just taste the mixture before adding the optional turbinado sugar, since a flavored powder may already bring extra sweetness.
Stored in the refrigerator, they keep for up to 2 weeks; in the freezer, they keep for up to 3 months.
Recipe Background
No-bake protein bars like these build on the classic combination of blended dried fruit and nut butter — a base commonly used in energy balls and bars — by adding protein powder and cocoa powder to turn a simple snack into something closer to a fudgy brownie. Using prunes instead of the more commonly used dates gives this version its own character while keeping the same no-bake, blend-and-press method. This style of no-bake bar has become a staple in meal prep and post-workout snacking precisely because it needs no baking equipment and no waiting on an oven, while still delivering a dessert-like payoff that plain protein shakes or bars often lack.
Conclusion
These No Bake Protein Brownie Bars are proof that a no-oven treat can still taste rich and indulgent while packing in real protein. Keep a batch in the fridge or freezer for whenever you need a quick, satisfying bite that tastes like dessert. Happy no-baking!
More Delicious Recipes You’ll Love
- No-Bake Brownie Cookies
- Blueberry Lemon Protein Bars
- Flourless Peanut Butter Brownies
- No-Bake Greek Yogurt Peanut Butter Fudge Crunch Bars
- Healthy Peanut Butter Greek Yogurt Brownie Blondies
Follow Poulef on Pinterest
Loved this recipe? Save it for later and follow @PoulefRecipe on Pinterest for more cozy, comforting bakes: https://www.pinterest.com/poulefrecipe/
Nutritional Information
Nutrition is per bar (12 servings), as provided by the recipe source.
| Nutrient | Amount per Serving |
|---|---|
| Calories | 142 |
| Carbohydrates | 10g |
| Protein | 9g |
| Fat | 9g |
| Fiber | 2g |

No Bake Protein Brownie Bars
- Total Time: 40 minutes
- Yield: 12 bars 1x
Description
Fudgy No Bake Protein Brownie Bars made with prunes, peanut butter, and protein powder, topped with melted chocolate and crushed peanuts.
Ingredients
12 pitted California prunes
4 tablespoons hot water
½ cup natural peanut butter
1 teaspoon vanilla extract
2 tablespoons turbinado sugar (optional)
¼ teaspoon salt
¾ cup unsweetened protein powder
⅓ cup cocoa powder
¼ cup dairy-free chocolate chips
¼ cup chopped salted peanuts
Instructions
1. Combine the prunes, hot water, and peanut butter in a blender; puree until smooth, scraping down the sides as needed.
2. Add the vanilla, sugar (if using), and salt; puree until smooth.
3. Transfer the mixture to a bowl; mix in the protein powder and cocoa powder until uniformly combined. Adjust the consistency by adding a little water if it’s too thick, or a bit more peanut flour or protein powder if it’s too sticky.
4. Line an 8×8-inch pan with parchment paper. Press the dough firmly into the pan, using a second sheet of parchment on top to help even it out.
5. Microwave the chocolate chips for 30–45 seconds until melted; spread a thin layer over the bars. Top with the crushed peanuts, pressing them gently into the chocolate.
6. Refrigerate for 30 minutes (or freeze for 15 minutes) before slicing into 12 squares.
Notes
Scrape down the sides of the blender as you go so the base purees evenly.
Adjust the dough’s consistency gradually until it’s firm but still pliable.
Let the chocolate topping set for the full chill time before slicing.
- Prep Time: 10 minutes
- Category: Snack
- Method: No-Bake
Nutrition
- Serving Size: 1 bar
- Calories: 142
- Fat: 9g
- Carbohydrates: 10g
- Fiber: 2g
- Protein: 9g
Table of Contents

Gianna Poulef
I’m Gianna Poulef from Poulef Recipes. I love sharing perfected dishes from my kitchen. I’m sure they’ll earn a spot in your heart. Let’s savor this journey together!.
Let’s be friends!