

This No-Bake Krispie Biscuit Cake is one of those wonderfully simple desserts that looks impressive but takes very little effort to make. A crunchy, chocolatey Krispie biscuit base is topped with a smooth, silky chocolate icing for the perfect combination of texture and rich chocolate flavor.
There’s no oven required, making this an especially convenient dessert when you want something sweet without spending hours in the kitchen. The biscuit base has a delicious crisp texture, while the creamy chocolate topping melts beautifully in your mouth.
It’s perfect for birthdays, parties, afternoon tea, family gatherings, potlucks, or those moments when a serious chocolate craving hits.
Why You’ll Love This Recipe
- No baking required: Everything comes together without turning on the oven.
- Easy ingredients: Simple pantry and refrigerator staples create a delicious dessert.
- Crunchy and creamy: The crisp Krispie biscuit base contrasts beautifully with silky chocolate icing.
- Rich chocolate flavor: Chocolate throughout the base and topping makes this a satisfying chocolate dessert.
- Great make-ahead dessert: It needs time to chill, so you can prepare it in advance.
- Perfect for sharing: Cut it into squares or bars for parties and gatherings.
Ingredients
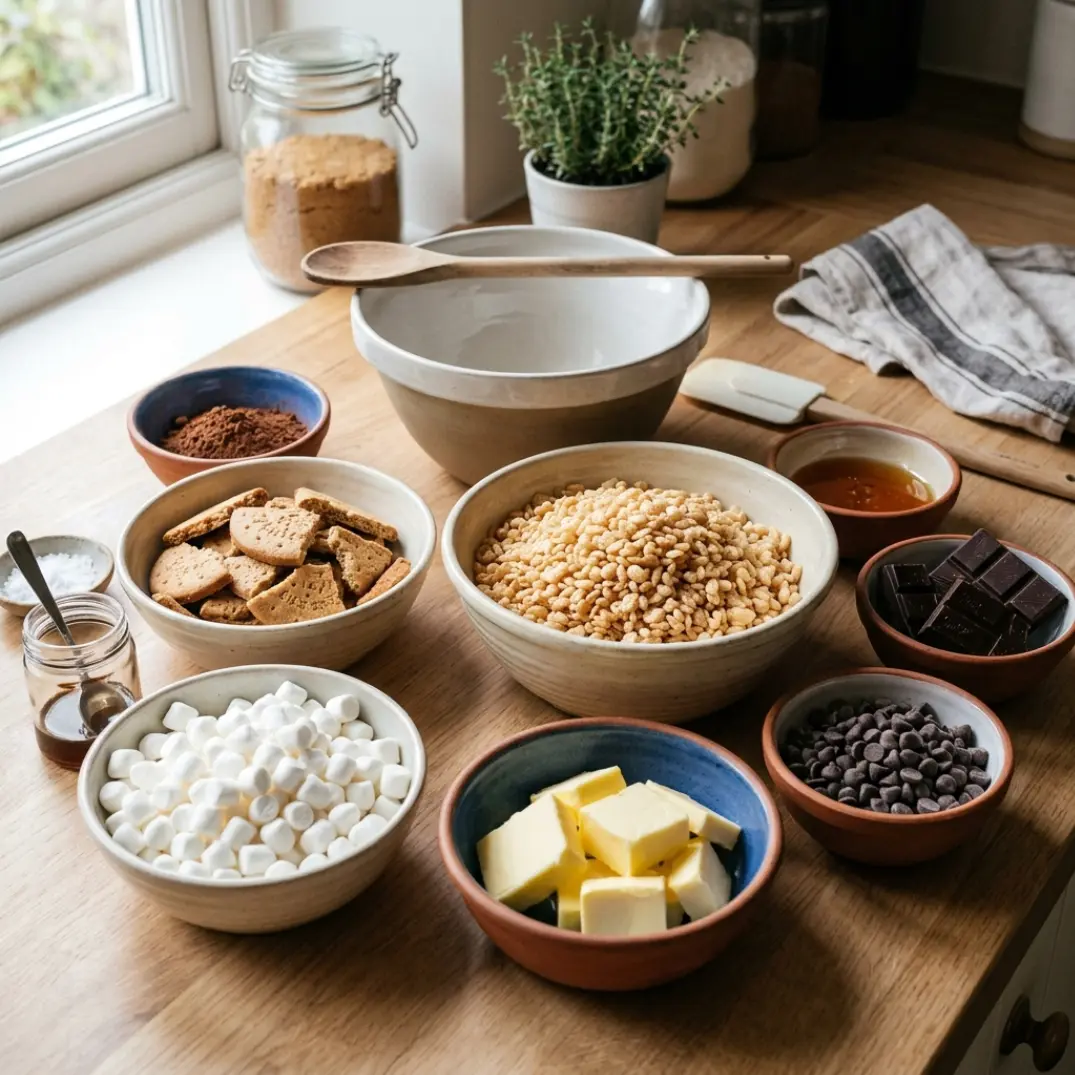
For the Krispie Biscuit Base
- 2 cups (about 200g) crisp rice cereal: Provides the signature crunchy texture.
- 7 ounces (200g) digestive biscuits, finely crushed: Creates the sturdy biscuit foundation.
- ½ cup (115g) unsalted butter: Helps bind the base together while adding richness.
- ½ cup (100g) granulated sugar: Adds sweetness to the biscuit mixture.
- ¼ cup (60ml) whole milk: Helps create a smooth mixture.
- 3 tablespoons (20g) unsweetened cocoa powder: Adds rich chocolate flavor to the base.
- 1 teaspoon vanilla extract: Enhances the chocolate flavor.
- Pinch of salt: Balances the sweetness.
For the Chocolate Icing
- 7 ounces (200g) semi-sweet or milk chocolate, chopped: Creates the rich chocolate foundation of the topping.
- ½ cup (120ml) heavy cream: Gives the icing a smooth, silky consistency.
- 2 tablespoons (28g) unsalted butter: Adds shine and richness.
- 1 teaspoon vanilla extract: Rounds out the chocolate flavor.
Equipment
- 8-inch or 9-inch square baking pan
- Parchment paper
- Food processor or rolling pin
- Large mixing bowl
- Medium saucepan
- Heatproof bowl
- Whisk
- Rubber spatula
- Measuring cups and spoons
- Refrigerator
- Sharp knife
Substitutions and Variations
Can I use another type of biscuit?
Yes. Digestive biscuits work particularly well, but graham crackers, shortbread cookies, or similar plain biscuits can also be used.
Can I use milk chocolate?
Absolutely. Milk chocolate creates a sweeter and creamier topping, while semi-sweet chocolate gives the cake a richer, slightly less sweet flavor.
Can I use dark chocolate?
Yes. Dark chocolate is an excellent choice if you prefer a deeper chocolate flavor and less sweetness.
Can I make this with gluten-free biscuits?
Yes. Use your favorite gluten-free plain biscuits or graham-style cookies to make a gluten-free version.
Can I add nuts?
Definitely. Chopped toasted hazelnuts, almonds, peanuts, or walnuts can be mixed into the biscuit base for extra crunch.
Can I add sprinkles?
Yes. Add colorful sprinkles, chocolate shavings, or crushed biscuits over the icing before it sets.
How to Make No-Bake Krispie Biscuit Cake
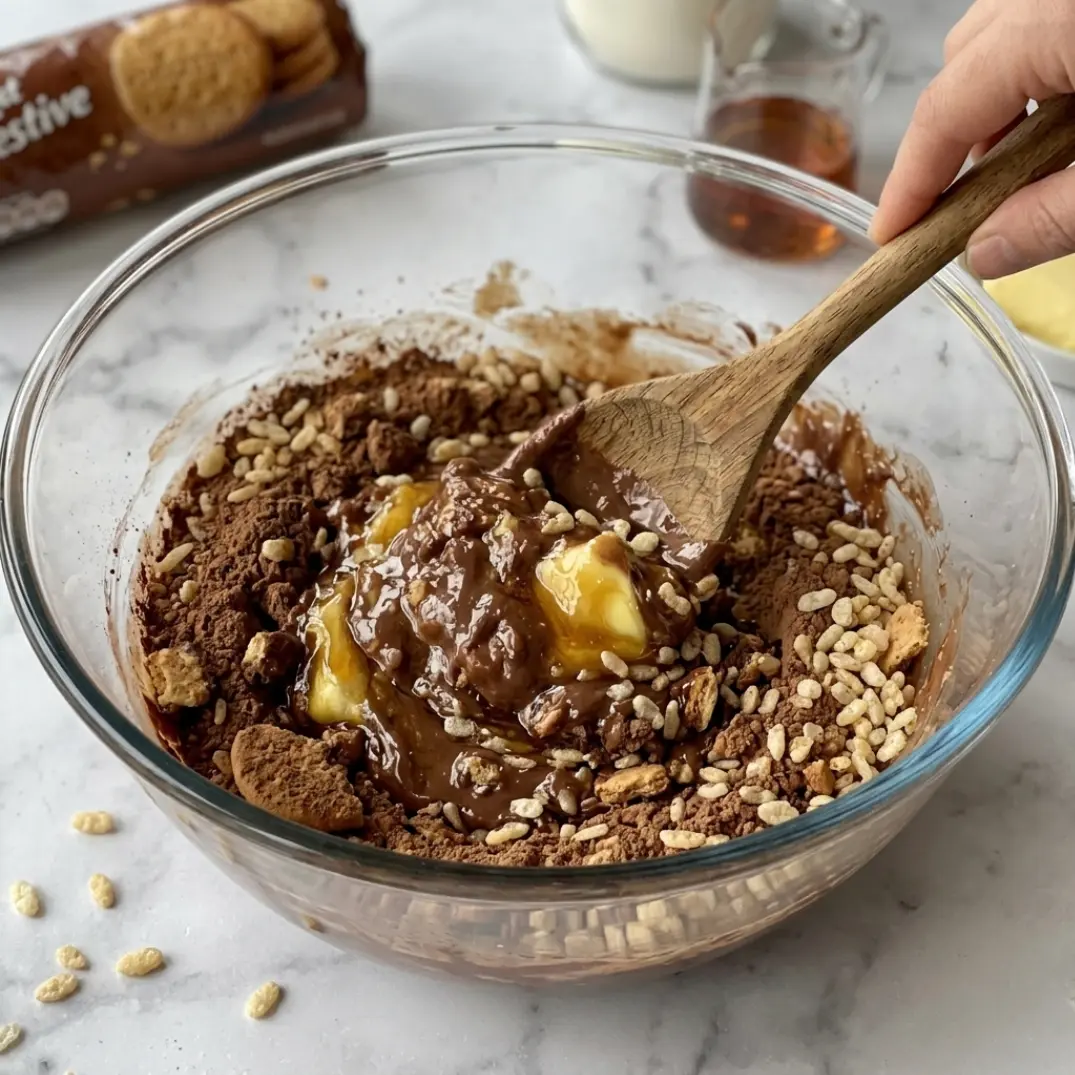
1. Prepare the pan
Line an 8-inch or 9-inch square baking pan with parchment paper, leaving some overhang on the sides.
The parchment will make it much easier to lift the chilled cake from the pan before slicing.
2. Crush the biscuits
Place the digestive biscuits in a food processor and pulse until finely crushed.
Alternatively, place them in a sealed bag and crush them with a rolling pin.
You want mostly fine crumbs with a few tiny pieces for additional texture.
3. Combine the dry ingredients
In a large mixing bowl, combine the crushed biscuits, crisp rice cereal, and cocoa powder.
Stir gently until everything is evenly distributed.
4. Make the chocolate mixture
Place the butter, granulated sugar, milk, cocoa powder, and salt in a medium saucepan.
Heat over low to medium heat, stirring frequently, until the butter has melted and the mixture is smooth.
Remove from the heat and stir in the vanilla extract.
5. Combine the base
Pour the warm chocolate mixture over the crushed biscuits and crisp rice cereal.
Use a rubber spatula to gently fold everything together until the biscuits and cereal are evenly coated.
Work gently so you don’t crush all of the crisp rice cereal.
6. Press into the pan
Transfer the mixture to the prepared baking pan.
Use the back of a spoon, spatula, or the bottom of a glass to press the mixture firmly and evenly into the pan.
Pay special attention to the corners so the finished cake holds together when sliced.
7. Make the chocolate icing
Place the chopped chocolate in a heatproof bowl.
Heat the heavy cream in a small saucepan until hot but not boiling.
Pour the hot cream over the chocolate and let it stand for about 2 minutes.
Add the butter and whisk gently until the chocolate is completely melted and the mixture is smooth and glossy.
Stir in the vanilla extract.
8. Add the icing
Pour the chocolate icing over the chilled or slightly cooled biscuit base.
Spread it evenly with a spatula.
For an extra decorative finish, sprinkle the top with chocolate shavings, crushed biscuits, chopped nuts, or sprinkles.
9. Chill
Refrigerate the cake for at least 2–3 hours, or until the base is firm and the chocolate icing has set.
For the cleanest slices, chilling overnight works especially well.
10. Slice and serve
Lift the cake from the pan using the parchment paper.
Place it on a cutting board and use a sharp knife to cut it into squares or bars.
For cleaner cuts, wipe the knife between slices.
Serve chilled or allow the pieces to sit at room temperature for a few minutes before serving.
What to Serve With It
This rich chocolate cake pairs beautifully with:
- Fresh strawberries
- Raspberries
- Whipped cream
- Vanilla ice cream
- Fresh coffee
- Espresso
- Black tea
- Hot chocolate
- Fresh berries
- A drizzle of caramel sauce
For an easy party dessert, cut the cake into small squares and arrange them on a serving platter.
Recipe Tips
- Line the pan: Parchment paper makes removing the chilled cake much easier.
- Don’t crush the cereal: Fold gently to preserve the crispy texture.
- Press the base firmly: A compact base will hold together better when sliced.
- Don’t boil the cream: Heat it until hot and steaming but avoid bringing it to a full boil.
- Use good-quality chocolate: Since chocolate is the main flavor, the quality makes a noticeable difference.
- Let the chocolate sit: Give the hot cream a couple of minutes to soften the chocolate before whisking.
- Chill completely: The base needs sufficient refrigeration time to firm up.
- Use a sharp knife: This helps create neat, attractive slices.
- Warm the knife slightly: For especially clean cuts, run the knife under warm water and dry it before slicing.
Storage
Store the No-Bake Krispie Biscuit Cake in an airtight container in the refrigerator.
It will keep well for approximately 4–5 days when properly covered.
The cake can also be frozen. Cut it into individual portions, wrap them well, and place them in a freezer-safe container.
Freeze for up to 2 months for the best quality.
Thaw the pieces in the refrigerator before serving.
Common Mistakes
Crushing the cereal too much
The crisp rice cereal provides important texture. Fold it gently into the chocolate mixture rather than crushing it.
Not pressing the base firmly enough
A loose base may crumble when sliced. Press the mixture firmly and evenly into the pan.
Boiling the cream
Boiling cream can affect the texture of the chocolate icing. Heat it until hot and steaming, then pour it over the chocolate.
Using cold chocolate
Chocolate melts more evenly when the hot cream is poured directly over chopped chocolate.
Cutting before chilling
The cake needs enough time in the refrigerator for the base and icing to firm up.
Overheating the chocolate
If the chocolate becomes too hot, the icing can lose its smooth texture. Melt it gently with the hot cream.
Recipe Background
No-bake biscuit cakes are popular because they transform simple cookies and chocolate into an easy chilled dessert without requiring an oven.
This version combines crushed biscuits with crisp rice cereal, creating a base that is both chocolatey and crunchy. The chocolate icing provides a smooth contrast to the crisp texture underneath.
The result is similar to a chocolate refrigerator cake, but with the added crunch of crisp rice cereal. It’s especially useful when you want a quick dessert for a gathering or need a recipe that can be prepared ahead of time.
Recipe Details
- Recipe: No-Bake Krispie Biscuit Cake
- Category: Dessert, Cake, No-Bake Dessert
- Cuisine: American
- Method: No-Bake, Chilling
- Prep Time: 20 minutes
- Chill Time: 2–3 hours
- Total Time: About 2 hours 20 minutes
- Yield: 16 servings
- Texture: Crunchy, creamy, rich, and chocolatey
- Flavor: Rich chocolate, buttery, sweet, and slightly crisp
- Diet: Vegetarian
Frequently Asked Questions
What is a no-bake biscuit cake?
A no-bake biscuit cake is a chilled dessert made by combining crushed biscuits with a sweet binding mixture and allowing it to firm up in the refrigerator instead of baking it.
Do I need to bake the biscuit base?
No. The base is pressed directly into the pan and chilled until firm.
Can I use Rice Krispies?
Yes. Crisp rice cereal such as Rice Krispies works perfectly for this recipe.
Can I make this cake ahead of time?
Yes. It’s an excellent make-ahead dessert. Prepare it the day before and keep it refrigerated until you’re ready to serve.
Why isn’t my biscuit cake holding together?
The base may not have been pressed firmly enough, or the butter and chocolate mixture may not have coated the biscuits evenly. Make sure the mixture is thoroughly combined and compacted firmly in the pan.
Can I use white chocolate?
Yes. White chocolate can be used for the topping, although it will create a much sweeter dessert.
Can I add peanut butter?
Absolutely. Swirl a few tablespoons of smooth peanut butter into the chocolate icing for a delicious chocolate-peanut butter variation.
How long does no-bake biscuit cake last?
Stored covered in the refrigerator, it should keep well for about 4–5 days.
Can I freeze it?
Yes. Wrap individual portions tightly and freeze for up to 2 months. Thaw in the refrigerator before serving.
Final Thoughts
This No-Bake Krispie Biscuit Cake proves that an amazing dessert doesn’t have to be complicated. The crunchy biscuit and Krispie base is packed with chocolate flavor, while the silky chocolate icing creates a rich and creamy finish.
Best of all, there’s no oven required. Simply mix, press, top, chill, and slice.
It’s perfect for busy days, parties, birthdays, afternoon treats, or whenever you’re craving something seriously chocolatey. Make it ahead, keep it chilled, and you’ll always have an easy dessert ready to share.
If you make this No-Bake Krispie Biscuit Cake, leave a rating and a comment, share how you served it, and take a photo to share. And don’t forget to save the recipe to Pinterest for the next time you’re looking for an easy no-bake chocolate dessert.
Nutrition
Nutrition information is an estimate and will vary depending on the biscuits, chocolate, cereal, and exact serving size used.
- Calories: Approximately 315 kcal
- Carbohydrates: Approximately 38g
- Protein: Approximately 4g
- Fat: Approximately 17g
- Saturated Fat: Approximately 10g
- Sugar: Approximately 23g
- Sodium: Approximately 160mg
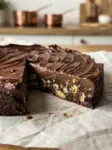
No-Bake Krispie Biscuit Cake
- Total Time: About 2 hours 20 minutes
- Yield: 16 servings 1x
- Diet: Vegetarian
Description
This No-Bake Krispie Biscuit Cake has a crunchy chocolate biscuit and crisp rice cereal base topped with silky, rich chocolate icing. It’s an easy no-bake dessert that requires no oven and is perfect for parties, birthdays, afternoon treats, family gatherings, and chocolate cravings.
Ingredients
2 cups (about 200g) crisp rice cereal
7 ounces (200g) digestive biscuits, finely crushed
1/2 cup (115g) unsalted butter
1/2 cup (100g) granulated sugar
1/4 cup (60ml) whole milk
3 tablespoons (20g) unsweetened cocoa powder
1 teaspoon vanilla extract
Pinch of salt
7 ounces (200g) semi-sweet or milk chocolate, chopped
1/2 cup (120ml) heavy cream
2 tablespoons (28g) unsalted butter
1 teaspoon vanilla extract
Instructions
1. Line an 8-inch or 9-inch square baking pan with parchment paper, leaving some overhang for easy removal.
2. Place the digestive biscuits in a food processor and pulse until finely crushed. Alternatively, crush them in a sealed bag with a rolling pin.
3. In a large mixing bowl, combine the crushed biscuits, crisp rice cereal, and cocoa powder.
4. Place the butter, granulated sugar, milk, cocoa powder, and salt in a medium saucepan. Heat over low to medium heat, stirring frequently, until the butter has melted and the mixture is smooth.
5. Remove the saucepan from the heat and stir in the vanilla extract.
6. Pour the warm chocolate mixture over the crushed biscuits and crisp rice cereal. Gently fold until everything is evenly coated, taking care not to crush the cereal.
7. Transfer the mixture to the prepared baking pan and press it firmly and evenly into the pan using a spatula or the bottom of a glass.
8. Place the base in the refrigerator while preparing the chocolate icing.
9. Place the chopped chocolate in a heatproof bowl. Heat the heavy cream in a small saucepan until hot and steaming but not boiling.
10. Pour the hot cream over the chocolate and let it stand for about 2 minutes.
11. Add the butter and whisk gently until the chocolate is completely melted and the icing is smooth and glossy. Stir in the vanilla extract.
12. Pour the chocolate icing over the biscuit base and spread it evenly with a spatula.
13. Refrigerate the cake for at least 2–3 hours, or until the base is firm and the chocolate icing has set.
14. Lift the cake from the pan using the parchment paper. Cut into squares or bars with a sharp knife and serve.
Notes
Line the baking pan with parchment paper so the chilled cake can be removed easily.
Use finely crushed digestive biscuits for a sturdy base.
Fold the crisp rice cereal gently into the chocolate mixture to preserve its crunch.
Press the base firmly and evenly into the pan so the finished cake holds together when sliced.
Heat the cream until hot and steaming but do not bring it to a full boil.
Let the hot cream sit over the chopped chocolate for about 2 minutes before whisking.
Use good-quality chocolate for the smoothest and richest icing.
Allow the cake to chill completely before slicing.
For clean slices, use a sharp knife and wipe it between cuts.
Add chopped nuts, chocolate shavings, sprinkles, or crushed biscuits to the topping if desired.
Store the finished cake covered in the refrigerator for 4–5 days.
Freeze individual portions in a freezer-safe container for up to 2 months.
Thaw frozen portions in the refrigerator before serving.
For a chocolate peanut butter variation, swirl smooth peanut butter into the chocolate icing before chilling.
- Prep Time: 20 minutes
- Cook Time: 0 minutes
- Category: Dessert, Cake, No-Bake Dessert
- Method: No-Bake, Chilling
- Cuisine: American
Nutrition
- Serving Size: 1 piece
- Calories: 315
- Sugar: 23g
- Sodium: 160mg
- Fat: 17g
- Saturated Fat: 10g
- Unsaturated Fat: 6g
- Trans Fat: 0g
- Carbohydrates: 38g
- Fiber: 3g
- Protein: 4g
- Cholesterol: 30mg
Table of Contents

Gianna Poulef
I’m Gianna Poulef from Poulef Recipes. I love sharing perfected dishes from my kitchen. I’m sure they’ll earn a spot in your heart. Let’s savor this journey together!.
Let’s be friends!