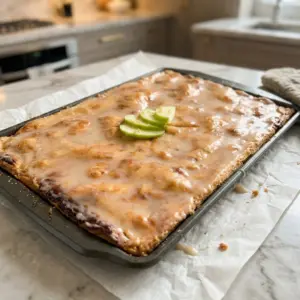

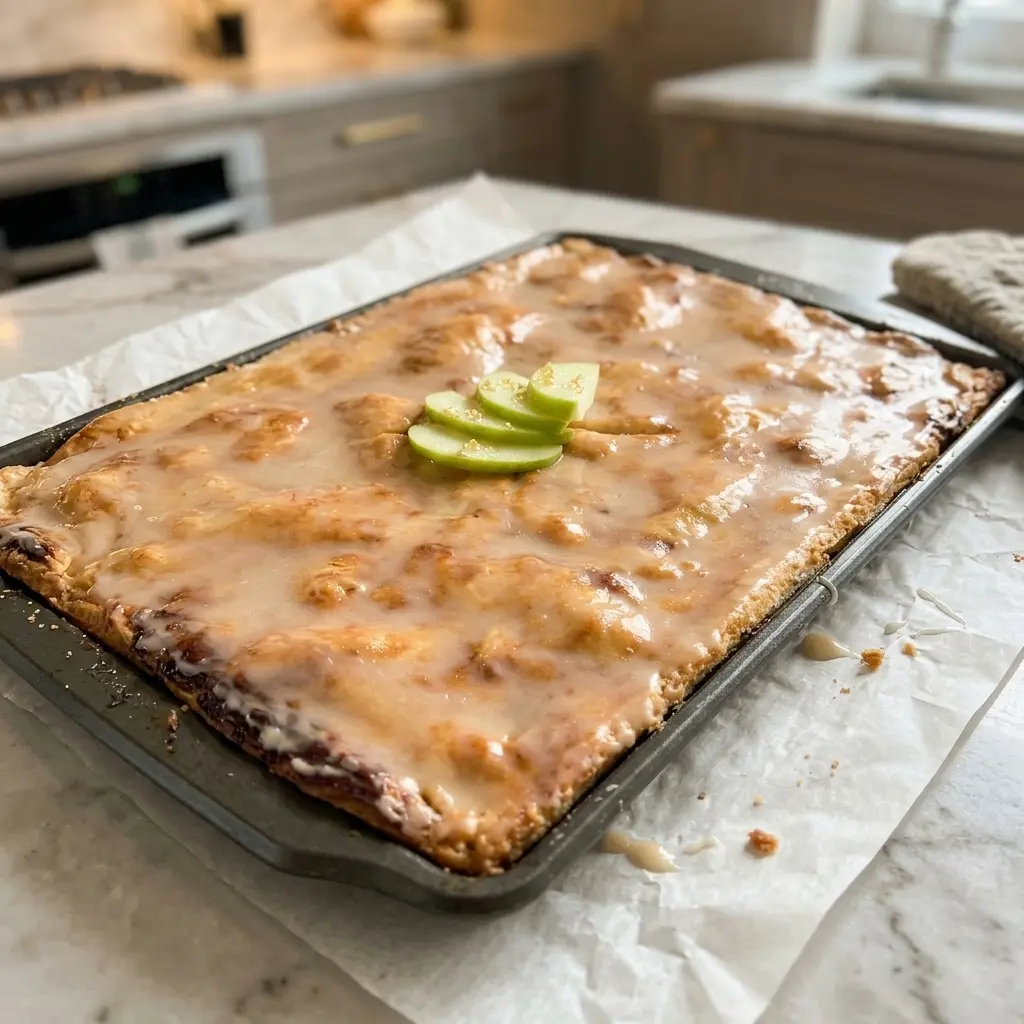
If you’ve ever wished apple pie were easier to serve at a big gathering — no messy slices, no deep dish to wrestle with — Mom’s Flat Apple Pie is exactly what you’ve been missing. Baked on a standard cookie sheet, this slab-style pie feeds 15 people from one pan, comes together with a flaky shortening crust, a cinnamon-sugar apple filling, and finishes with a simple powdered sugar drizzle that sets the whole thing off. It tastes just like classic homemade apple pie, only it’s easier to cut, easier to carry, and impossible to leave alone.
This is the kind of recipe that shows up at potlucks, holiday tables, and after-school baking sessions. One pan, a mountain of Granny Smith apples, and that sweet vanilla frosting drizzled over the top while it’s still warm — it’s the flat apple pie your whole family will request every fall.
Why You’ll Love This Recipe
- Feeds a crowd — makes 15 generous servings from one cookie sheet pan
- Classic apple pie flavor with a buttery, flaky homemade crust
- The Corn Flakes trick absorbs excess juice so the bottom crust stays perfectly crisp
- Simple ingredients you likely already have in your pantry
- Quick to bake — only 25–30 minutes at 425°F
- Beautiful vanilla drizzle makes it look bakery-worthy with barely any effort
What Does It Taste Like?
Imagine a classic apple pie — tart Granny Smith apples softened by cinnamon and sugar, all wrapped in a tender, slightly flaky crust — but lighter, thinner, and easier to eat out of hand. The bottom crust stays firm thanks to the Corn Flakes layer, which soaks up the apple juices without turning soggy. The filling is straightforward and genuinely delicious: sweet, spiced, and apple-forward. The thin powdered sugar glaze on top adds just enough sweetness and a pretty finish without overpowering the fruit. It’s comfort food at its very best.
Recipe Overview
Mom’s Flat Apple Pie is a slab-style apple pie baked on a 15×10-inch cookie sheet. The crust is made from scratch with shortening, flour, egg yolk, and milk — a classic, easy-to-roll dough. Corn Flakes go down first on the bottom crust to act as a moisture barrier, then sliced Granny Smith apples are layered on, topped with cinnamon sugar and cubed butter. A second crust goes on top, gets brushed with egg white and sugar for a golden shine, and the whole thing bakes at 425°F for 25–30 minutes. While it’s still hot, a thin vanilla powdered sugar frosting is drizzled over the top.
Ingredients
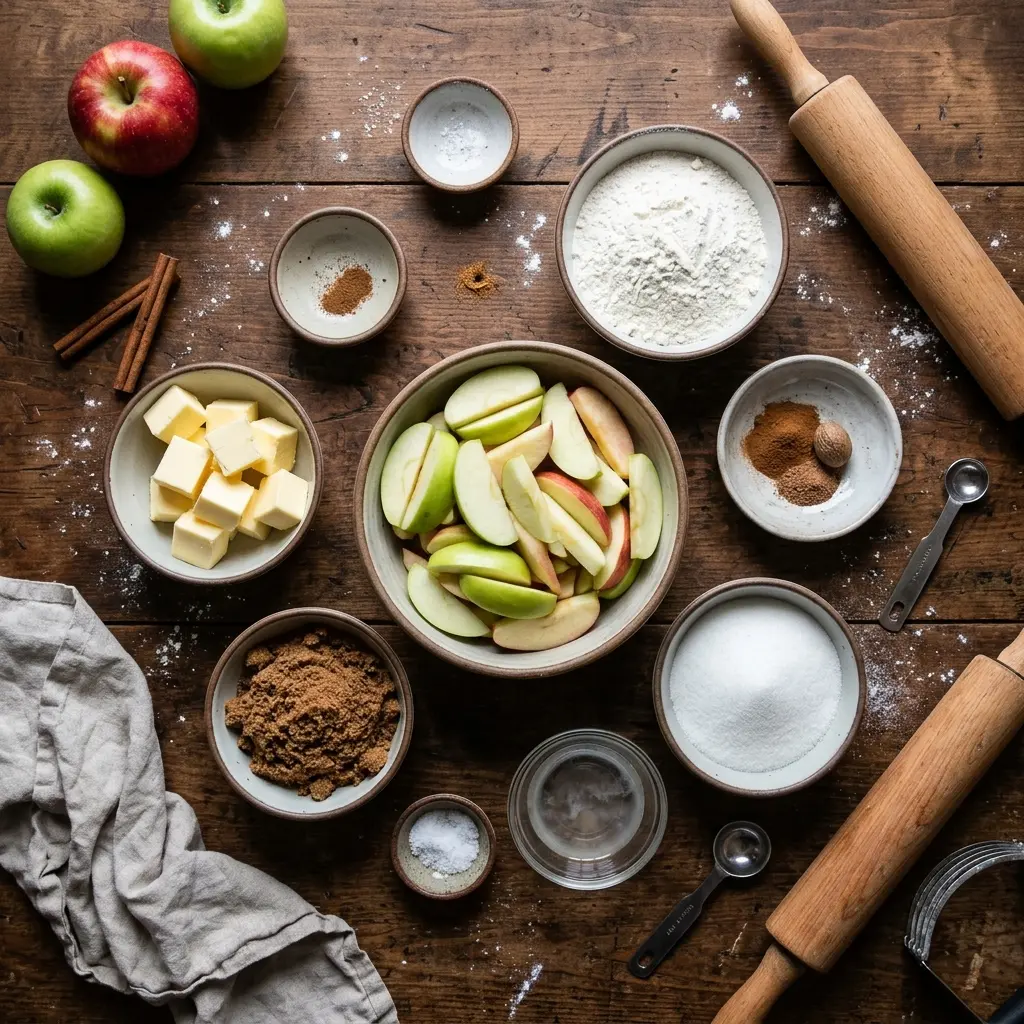
For the Crust:
- 3 ¾ cups all-purpose flour
- ¾ teaspoon salt
- 1 ½ cups shortening
- 1 egg yolk + enough milk to make 1 cup of liquid total
For the Filling:
- 2–3 handfuls of Corn Flakes
- 8–10 Granny Smith apples, sliced and cored
- 1 cup sugar
- 1 teaspoon cinnamon
- 4–8 tablespoons butter, cubed
For the Egg Wash:
- 1 egg white
- 1 teaspoon sugar
For the Thin Frosting:
- â…” cup powdered sugar
- 2–3 dashes vanilla extract
- Milk, enough to make a thin drizzleable frosting
Ingredient Notes
Shortening: This is the classic choice for a flaky, tender slab pie crust. Shortening has a higher melting point than butter, which means the fat stays solid longer during baking and creates distinct flaky layers. Don’t substitute butter here unless you want a richer (but less flaky) result — and if you do swap, keep the butter very cold.
Egg yolk + milk liquid: The egg yolk adds richness and helps bind the crust, while the milk provides just enough liquid to bring the dough together. The key is that the total amount equals exactly 1 cup — crack the egg yolk into a measuring cup, then fill to the 1-cup line with milk. This ratio keeps the dough pliable without being sticky.
Granny Smith apples: These are the go-to for baked apple desserts because they hold their shape, don’t turn mushy, and their tartness balances the sweetness of the cinnamon sugar filling. The recipe calls for 8–10 apples — use 8 if they’re large, 10 if they’re on the smaller side. You want a generous but even layer across the whole sheet.
Corn Flakes: This is the secret to a crisp bottom crust. When the apples release their juices during baking, the Corn Flakes absorb the excess moisture before it can soak into the dough. You won’t taste them in the finished pie — they just disappear into the filling — but your bottom crust will be perfectly firm instead of soggy.
Butter (4–8 tablespoons): Dotting the apples with cubed butter adds richness and helps the filling cook evenly. Use 4 tablespoons for a lighter result, or the full 8 if you want a richer, more buttery filling.
Powdered sugar frosting: This is a simple glaze — just powdered sugar, a couple of dashes of vanilla, and enough milk to make it thin and drizzleable. Add the milk a teaspoon at a time until you get the right consistency. It should flow off a spoon in a thin stream, not plop.
Kitchen Tools You’ll Need
- 15×10-inch rimmed cookie sheet (jelly roll pan)
- Large mixing bowl
- Rolling pin
- Apple peeler/corer or knife and cutting board
- Small bowl for egg wash
- Pastry brush
- Knife or pastry wheel for cutting slits
- Small bowl and whisk or fork for the frosting
Substitutions and Variations
Different apples: Granny Smith are ideal, but you can mix in Honeycrisp or Braeburn for a sweeter, more complex filling. Avoid very soft apple varieties like McIntosh — they tend to turn to mush during baking.
Add spices: A pinch of nutmeg or allspice alongside the cinnamon adds warmth and depth to the filling. Start with ¼ teaspoon of either — they’re strong.
Brown sugar filling: Swap half or all of the white sugar in the filling for brown sugar. Brown sugar adds a caramel-like depth that pairs beautifully with Granny Smith apples.
Lemon juice: Add a tablespoon of fresh lemon juice tossed with the apples to brighten the flavor and slow any browning while you’re prepping.
Crumble topping instead of top crust: Skip the top crust and instead cover the apples with a simple streusel (oats, flour, brown sugar, butter, cinnamon) for an apple crumble slab version.
Store-bought crust: In a pinch, two packages of refrigerated pie crust can sub in — just roll them thin enough to cover the sheet pan.
How to Make Mom’s Flat Apple Pie
This pie comes together in four main stages: making the crust, building the filling, assembling the pie, and baking. Here’s what to expect at each stage.
Start by preheating your oven to 425°F. The dough comes together quickly — you’re mixing cold shortening into flour and salt, then adding the egg yolk and milk mixture until it forms a dough. It doesn’t need to rest in the fridge, which is one reason this recipe is so quick. While the dough rests briefly, peel and slice your apples. Keep the slices roughly the same thickness (about ¼ inch) so they cook evenly.
Dividing and rolling the dough is the step that intimidates people, but slab pie dough is actually more forgiving than a round pie because you have a rectangular pan to guide you. Roll it right on the cookie sheet if you can, or roll it on a floured surface and transfer carefully.
Step-by-Step Instructions
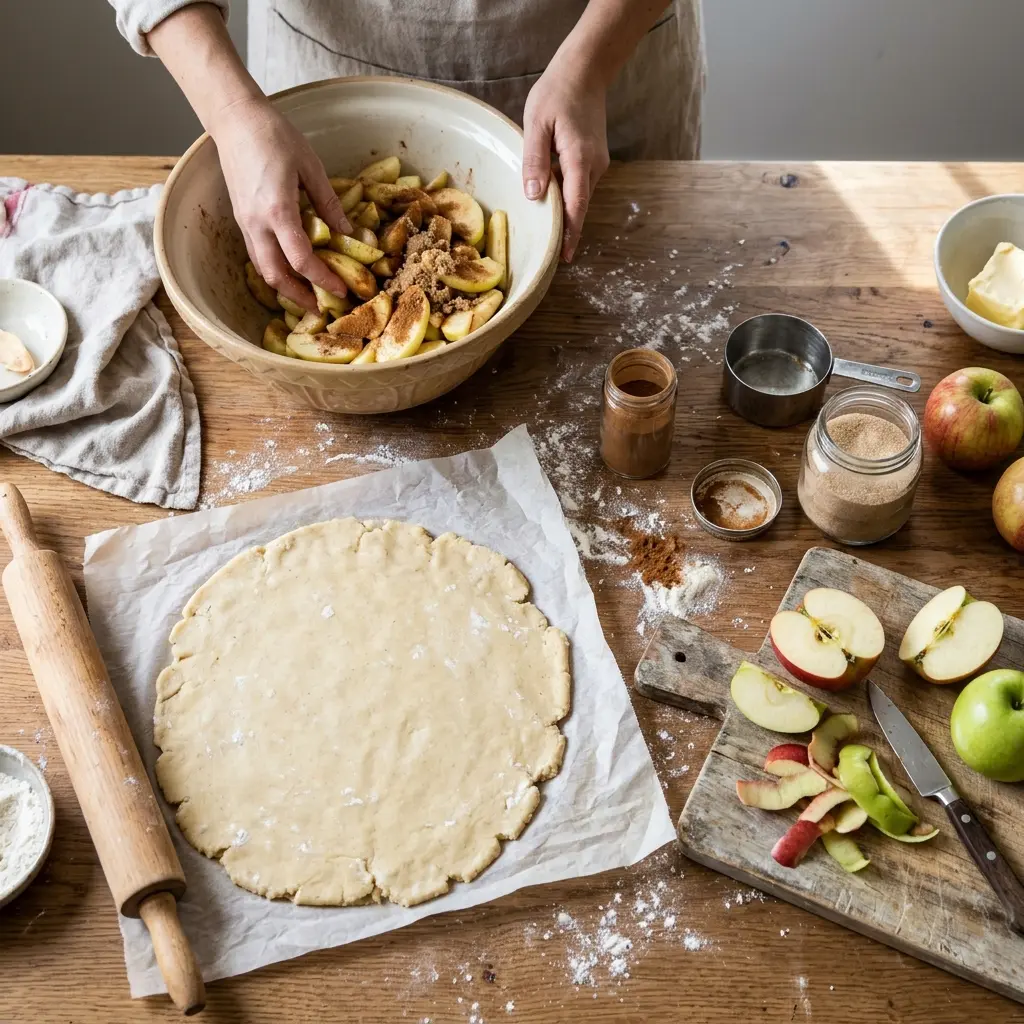
- Preheat oven to 425°F.
- Make the crust: In a large bowl, combine the flour and salt. Cut in the shortening until the mixture resembles coarse crumbs. Crack the egg yolk into a measuring cup, then fill with milk to reach exactly 1 cup. Add this liquid to the flour mixture and stir until a dough forms.
- Roll out bottom crust: Divide the dough in half. Roll one half out on a floured surface (or directly on the pan) to fit a 15×10-inch cookie sheet, including enough to come slightly up the sides.
- Add Corn Flakes: Sprinkle 2–3 handfuls of Corn Flakes evenly over the bottom crust. This layer absorbs the apple juices and keeps the crust crisp.
- Add apple layer: Arrange the sliced apples in an even layer on top of the Corn Flakes, covering the crust fully.
- Add filling: Mix together the 1 cup sugar and 1 teaspoon cinnamon. Sprinkle the cinnamon sugar evenly over the apples. Dot the apples with 4–8 tablespoons of cubed butter.
- Add top crust: Roll out the second half of the dough and lay it over the apple filling. Press the edges together to seal. Cut several slits in the top crust to allow steam to escape.
- Egg wash: Beat the egg white with the 1 teaspoon sugar until combined. Brush this mixture over the entire top crust for a golden, slightly sweet finish.
- Bake: Bake at 425°F for 25–30 minutes, until the crust is golden brown and the filling is bubbling through the slits.
- Make the frosting: While the pie bakes, stir together the powdered sugar, 2–3 dashes of vanilla extract, and enough milk to make a thin, drizzleable frosting.
- Drizzle and serve: As soon as the pie comes out of the oven, drizzle the thin frosting over the hot pie. Let it set for a few minutes, then cut into squares and serve.
Tips for Success
- Don’t skip the Corn Flakes. It sounds unusual, but this step is essential. Without it, the apple juices pool at the bottom and make the crust soggy. Two to three generous handfuls is the right amount — enough to cover the crust in a thin, even layer.
- Keep your shortening cold. The flakier the crust, the better. Cold fat = steam pockets = flakiness. If your kitchen is warm, chill the shortening for 15 minutes before you start.
- Slice apples evenly. Uniform slices (about ¼ inch thick) ensure the apples cook through in the allotted bake time. Very thick slices may still be crunchy when the crust is already golden.
- Roll the dough thin. This is a flat pie — the crust should be relatively thin compared to a standard deep-dish pie. If the dough is too thick, the bottom won’t crisp up properly and the ratio of crust to filling will be off.
- Cut plenty of steam vents. The slits in the top crust do real work — they let steam escape so it doesn’t build up and make the top crust puff and crack unevenly. Cut at least 6–8 slits across the top.
- Drizzle while hot. The frosting goes on immediately after the pie comes out of the oven. The heat of the pie thins the glaze slightly and helps it seep into the slits, adding flavor throughout.
- Use 8–10 apples based on size. The test kitchen used 8 during testing. If your Granny Smiths are on the smaller side, go up to 10. You want enough apple to form a full, generous layer without piling too high.
How to Know It’s Done
The pie is ready when the top crust is a deep golden brown and you can see the apple filling bubbling up through the steam vents. If the edges are browning much faster than the center, tent the edges loosely with foil for the last 5–10 minutes. The apples should be tender — you can test by poking a knife through one of the vents; it should slide in with little resistance. Total bake time is 25–30 minutes at 425°F.
What to Serve With It
Mom’s Flat Apple Pie is a crowd-pleaser on its own, but a few simple additions make it even better:
- Vanilla ice cream — the classic pairing. The cold, creamy ice cream against the warm, spiced pie is unbeatable.
- Fresh whipped cream — lighter than ice cream and equally delicious.
- A drizzle of caramel sauce — adds another layer of flavor that complements both the apples and the cinnamon.
- A cup of coffee or hot apple cider — especially in the fall, this combination is perfect.
For more cozy baked apple recipes, try the Easy Homemade Apple Cake or the stunning Apple and Custard Cinnamon Ring.
Storage Instructions
Cover the cooled pie tightly with plastic wrap or foil and store at room temperature for up to 2 days, or in the refrigerator for up to 4–5 days. Because the pie is baked on a sheet pan, it stores flat and stacks well in the fridge. Reheat individual squares in a 300°F oven for 8–10 minutes to re-crisp the crust, or microwave briefly for a quicker warm-up (though the crust won’t be as crisp this way).
Freezing Instructions
This flat apple pie freezes well. Let it cool completely, then cut into squares and arrange in a single layer on a parchment-lined sheet pan. Freeze until solid (about 2 hours), then transfer to a zip-top freezer bag or airtight container with parchment between the layers. Freeze for up to 3 months. Thaw overnight in the refrigerator and reheat in a 325°F oven for 10–15 minutes until warmed through. Note: the powdered sugar glaze may become slightly tacky after freezing and thawing — this is normal and doesn’t affect the flavor.
Common Mistakes
Skipping the Corn Flakes layer. This is the most common mistake, especially for first-timers who think it sounds unnecessary. The corn flakes are there for a practical reason: Granny Smith apples release a lot of juice as they bake, and without something to absorb it, that juice pools on the bottom crust and makes it wet and dense. Don’t skip it.
Making the crust too thick. Since this is a flat pie, there’s less depth for the crust-to-filling ratio to work itself out. A thick crust here means you taste more dough than apple. Roll both halves as thin as you comfortably can while still being able to transfer them without tearing.
Not sealing the edges properly. The edges of a slab pie are more exposed than a standard round pie. If you don’t press them together firmly, the filling bubbles out the sides during baking and can burn on the pan. Take a moment to really crimp or press the edges.
Applying frosting to a cold pie. The thin vanilla glaze is meant to go on the hot pie — it seeps in slightly and sets with a beautiful sheen. If you let the pie cool first, the frosting just sits on top as a thick coating rather than integrating with the crust.
Uneven apple slices. Thick chunks of apple won’t cook through in 25–30 minutes; paper-thin slices will turn to mush. Aim for consistent ¼-inch slices. A mandoline slicer makes this quick and uniform.
Recipe Background
Slab pies have a long history in American baking — particularly in farm and community kitchens where feeding a large group efficiently was the goal. The idea is simple: take the components of a traditional two-crust apple pie, spread them on a sheet pan, and you can serve three times as many people with the same effort. The genius of this particular family recipe is the Corn Flakes layer, a classic home baker’s trick that’s been around for decades. The cereal acts as a natural thickener and moisture sponge, delivering the crisp-bottomed result that separates a truly great slab pie from a soggy disappointment.
Granny Smith apples have been the baker’s choice for pies since the variety became widely available in the United States in the 1970s. Their firm texture, high acidity, and low sugar content make them nearly perfect for baking — they don’t fall apart, their tartness balances sugar well, and they cook evenly. Combined with the classic shortening-based crust (a staple of mid-century American baking, valued for its reliable flakiness and neutral flavor), this flat apple pie has the hallmarks of a genuinely timeless recipe.
The powdered sugar glaze at the end is the finishing touch that elevates this from “sheet pan apple pie” to something that feels a little special — the kind of detail that makes people say “wait, did you make this?” when you bring it to a gathering.
Frequently Asked Questions
Can I use a different type of apple?
Granny Smith are strongly recommended because they hold their shape and their tartness balances the sweetness of the filling. That said, Honeycrisp, Braeburn, or Pink Lady also work well. Avoid very soft varieties like McIntosh or Golden Delicious — they tend to break down into applesauce during baking.
Can I use butter instead of shortening in the crust?
Yes, though the texture will be slightly different. Butter produces a richer, more flavorful crust, but it’s also softer and can be harder to work with. If you use butter, keep it very cold and work quickly. The traditional recipe uses shortening for its reliable flakiness.
Can I make this ahead of time?
Yes. You can assemble the pie (without baking) up to 24 hours in advance, cover it tightly with plastic wrap, and refrigerate it. Bake straight from the fridge, adding 5 minutes to the bake time. Alternatively, bake it the day before and reheat the whole pan at 300°F for 15 minutes before serving.
Can I freeze flat apple pie?
Absolutely. See the Freezing Instructions section above for how to freeze and reheat it properly. It keeps well for up to 3 months.
Why do I use Corn Flakes?
Corn Flakes absorb the excess juice released by the apples during baking, preventing a soggy bottom crust. They become completely soft and invisible in the finished pie — you won’t taste them or notice a texture difference. It’s a clever home baker’s trick that makes a real difference.
What size pan should I use?
A 15×10-inch rimmed baking sheet (also called a jelly roll pan) is the right size for this recipe and yields 15 servings. A 13×9-inch pan will also work but will give you a thicker pie and fewer (larger) pieces.
Can I use store-bought pie crust?
Yes, though you’ll need two packages of refrigerated pie crusts. Roll them thin enough to cover the pan. The homemade shortening crust is easy and worth making, but store-bought is a perfectly acceptable shortcut.
My crust browned too quickly — what do I do?
If the edges are darkening before the center is done, loosely tent the edges with aluminum foil and continue baking. The center of a flat pie cooks faster than a deep-dish, but the edges can still overbrown if your oven runs hot.
Conclusion
Mom’s Flat Apple Pie is proof that some of the best recipes are the simplest ones. One pan, real ingredients, a little bit of technique, and you have a gorgeous, crowd-sized apple pie ready to serve in under an hour and a half — including prep time. The Corn Flakes trick keeps the crust crisp, the Granny Smith apples hold up beautifully under the cinnamon sugar, and that thin vanilla glaze makes the whole thing look bakery-worthy. Whether you’re making it for a holiday dessert table, a potluck, or just because it’s apple season and you have a bag of Granny Smiths on the counter — this one delivers every time. Happy baking!
More Delicious Recipes You’ll Love
- Easy Homemade Apple Cake
- Apple and Custard Cinnamon Ring
- Apple Cranberry Cake
- Baby Gooey Pecan Pie Cookie Cups
- Toffee Apple Cake
Follow Poulef on Pinterest
Love this recipe? Save it and share it! Follow us at @PoulefRecipe on Pinterest for new recipes every day — from easy weeknight dinners to show-stopping desserts.
Nutritional Information
Nutrition is estimated per serving (1 of 15 squares). Actual values may vary based on apple size and exact butter quantity used.
| Nutrient | Amount per Serving |
|---|---|
| Calories | ~420 |
| Carbohydrates | ~57g |
| Fat | ~21g |
| Protein | ~4g |
| Sugar | ~28g |
| Sodium | ~130mg |
Mom’s Flat Apple Pie
- Total Time: 1 hour 10 minutes
- Yield: 15 servings 1x
Description
Mom’s Flat Apple Pie is a classic slab-style apple pie baked on a cookie sheet — flaky homemade shortening crust, cinnamon-sugar Granny Smith apples, and a thin vanilla powdered sugar drizzle. It feeds 15 people from one pan and is easier to serve than a traditional deep-dish pie.
Ingredients
3 3/4 cups all-purpose flour
3/4 teaspoon salt
1 1/2 cups shortening
1 egg yolk, plus enough milk to make 1 cup of liquid
8–10 Granny Smith apples, peeled, cored, and sliced
1 cup granulated sugar
1 teaspoon ground cinnamon
4–8 tablespoons butter, cubed
2–3 handfuls Corn Flakes, lightly crushed
1 egg white
1 teaspoon sugar
THIN FROSTING:
2/3 cup powdered sugar
2–3 dashes vanilla extract
2–3 tablespoons milk, or enough to make a thin drizzle
Instructions
1. Preheat the oven to 425°F.
2.
3. Make the crust: In a large bowl, combine the flour and salt. Cut in the shortening until the mixture resembles coarse crumbs.
4.
5. Crack the egg yolk into a measuring cup and add enough milk to reach exactly 1 cup. Add the liquid to the flour mixture and stir until a dough forms.
6.
7. Divide the dough in half. Roll one half out on a floured surface to fit a 15×10-inch rimmed cookie sheet, pressing it slightly up the sides.
8.
9. Sprinkle 2–3 handfuls of lightly crushed Corn Flakes evenly over the bottom crust.
10.
11. Arrange the sliced apples in an even layer over the Corn Flakes.
12.
13. Mix the granulated sugar and cinnamon together. Sprinkle evenly over the apples, then dot with the cubed butter.
14.
15. Roll out the second half of the dough and carefully place it over the apple filling. Press the edges together to seal.
16.
17. Cut several small slits in the top crust to allow steam to escape.
18.
19. Beat the egg white with 1 teaspoon of sugar until combined. Brush over the entire top crust.
20.
21. Bake for 25–30 minutes, until the crust is deep golden brown and the filling is bubbling through the slits.
22.
23. While the pie bakes, whisk together the powdered sugar, vanilla extract, and enough milk to make a thin, drizzleable frosting.
24.
25. As soon as the pie comes out of the oven, drizzle the frosting over the hot crust.
26.
27. Let it set for a few minutes, then cut into squares and serve.
Notes
Use a 15×10-inch rimmed cookie sheet (jelly roll pan) for approximately 15 servings.
Use 8 large apples or 10 smaller apples for a full, even layer.
Do not skip the Corn Flakes layer. It helps absorb excess apple juices and keeps the bottom crust crisp.
Drizzle the frosting while the pie is still hot so it sets with a beautiful sheen.
To freeze: Cool completely, cut into squares, and store in a freezer-safe zip-top bag for up to 3 months.
- Prep Time: 40 minutes
- Cook Time: 30 minutes
- Category: Dessert
- Method: Bake
- Cuisine: American
Nutrition
- Serving Size: 1 square
- Calories: 420
- Sugar: 28g
- Sodium: 130mg
- Fat: 21g
- Carbohydrates: 57g
- Protein: 4g
Table of Contents

Gianna Poulef
I’m Gianna Poulef from Poulef Recipes. I love sharing perfected dishes from my kitchen. I’m sure they’ll earn a spot in your heart. Let’s savor this journey together!.
Let’s be friends!