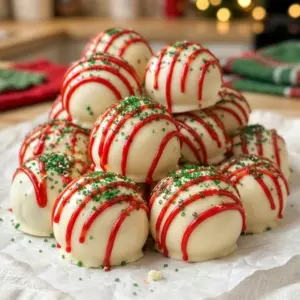

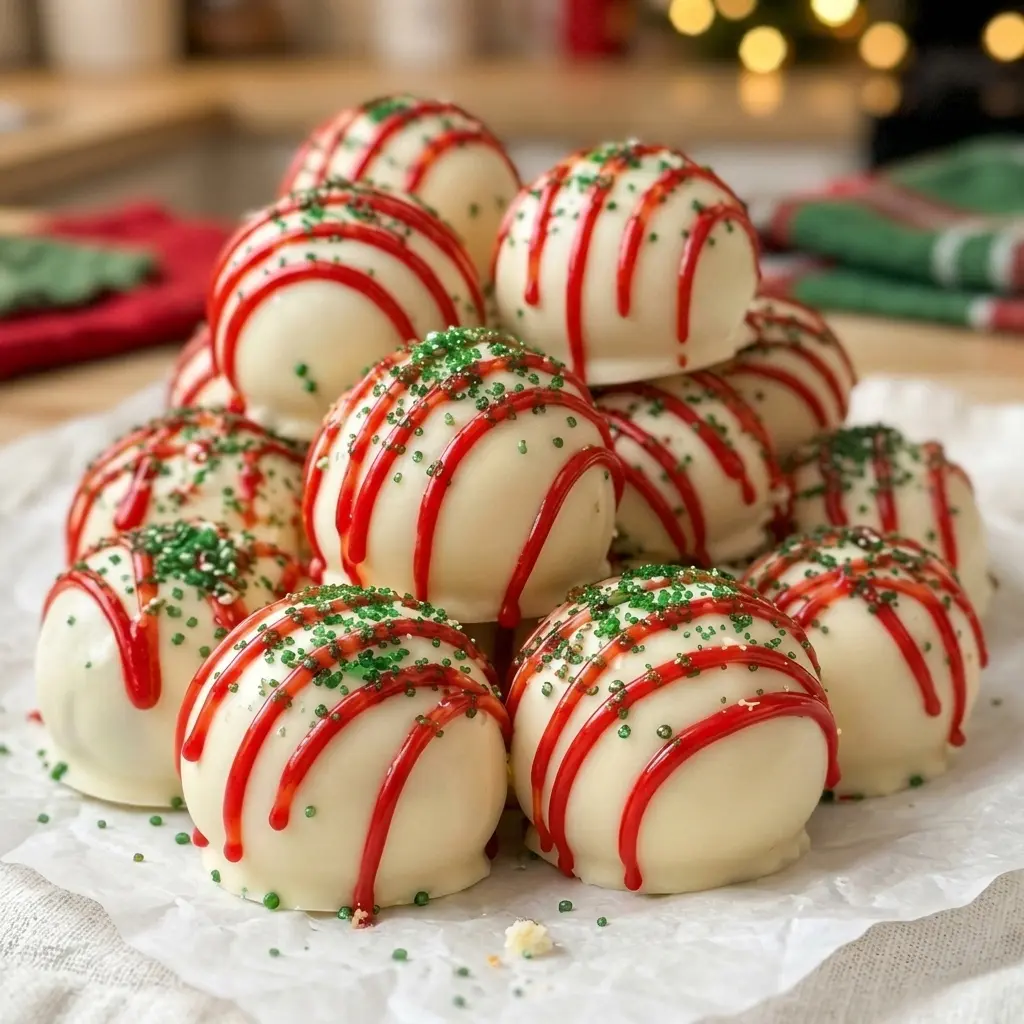
If you’re looking for a holiday treat that’s as fun to make as it is to eat, these Christmas tree cake balls are exactly what you need. Moist white cake crumbles are mixed with creamy frosting, rolled into little balls, dipped in vibrant green candy coating, and finished with a drizzle of white chocolate and a shower of festive sprinkles. The result is a bite-sized treat that looks totally impressive but comes together with simple, pantry-friendly ingredients.
These are the kind of recipe that turns an afternoon in the kitchen into a real holiday activity. Kids love rolling the balls and adding the sprinkles, and adults love how little stress is involved. Whether you’re building a Christmas cookie box, bringing something to a holiday party, or just want a sweet treat on a cozy December evening, this is a recipe that delivers every time.
Why You’ll Love This Recipe
- No special equipment needed — just a bowl, a baking sheet, and a microwave.
- Totally festive — that bright green candy coating and white chocolate drizzle look like they came from a bakery.
- Great for gifting — they pack beautifully in holiday tins or treat boxes.
- Kid-friendly — rolling and decorating is a great activity for little helpers.
- Make-ahead friendly — the cake mixture can be made a day ahead, and the finished balls keep well in the fridge for up to a week.
- Easy to customize — swap the white cake for chocolate, change the sprinkle colors, or shape them into cones for a more tree-like look.
What Do They Taste Like?
Christmas tree cake balls taste like a little bite of celebration. The white cake base is tender and moist, and mixing it with frosting gives each bite a soft, almost truffle-like texture that melts in your mouth. The green candy coating adds a satisfying shell with a slight vanilla-sweet flavor, and the white chocolate drizzle layers in a creamier, richer note. Every bite is sweet, soft, and festive — exactly what a holiday treat should be.
Recipe Overview
- Prep Time: 30 minutes
- Freeze/Chill Time: 30 minutes
- Total Time: About 1 hour
- Yield: About 24–30 cake balls
- Difficulty: Easy
Ingredients
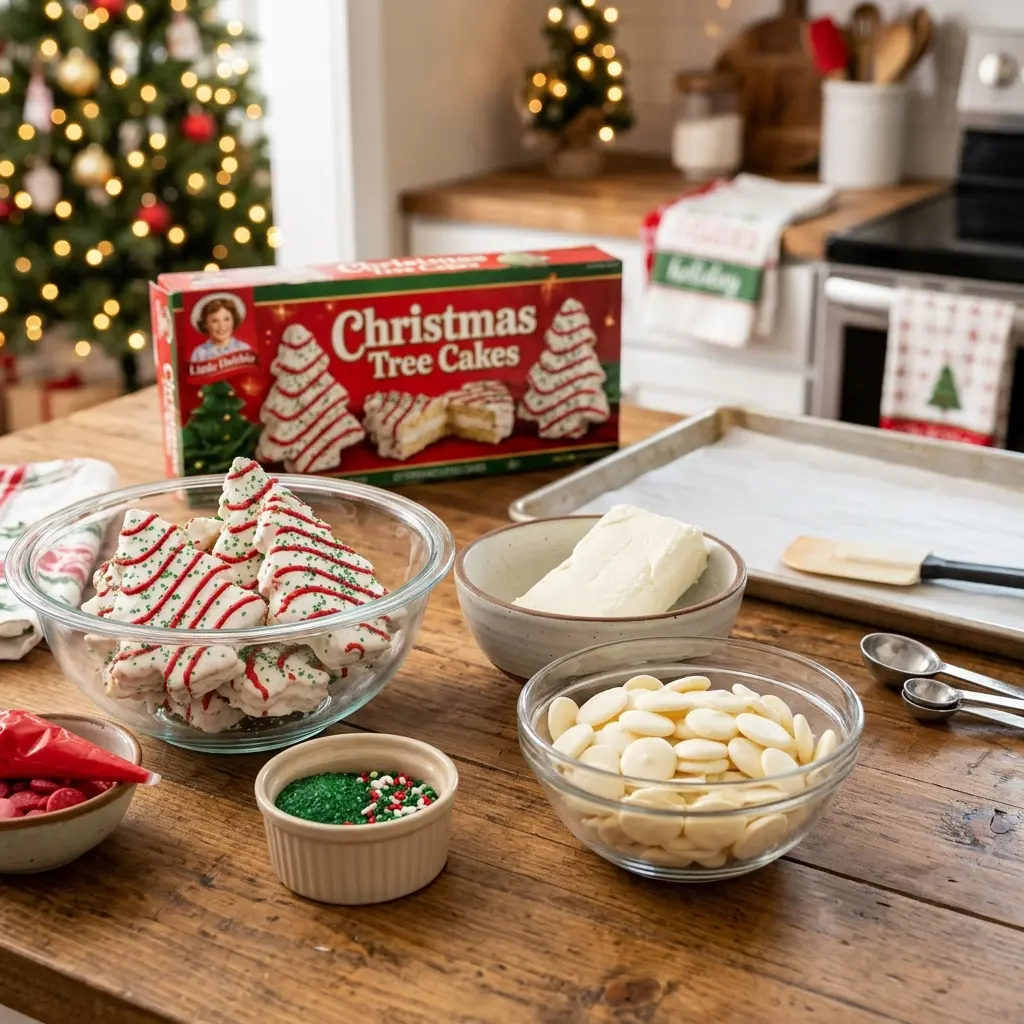
- 1 box white cake mix (plus the ingredients listed on the back of the box — usually eggs, oil, and water)
- 1 cup white frosting (from a container)
- 2 cups green candy melts
- ½ cup white chocolate chips (or white candy melts)
- Sprinkles or edible glitter for decoration
Ingredient Notes
White cake mix: A standard 15.25 oz box works perfectly. White cake gives you the cleanest base flavor, and the pale color means the green coating pops. You can substitute yellow cake mix if that’s what you have — the flavor shifts slightly toward buttery but it’s still delicious.
White frosting: Store-bought works great here and keeps the recipe simple. You don’t need a full can — just 1 cup, which is roughly half a standard 16 oz container. The frosting binds the cake crumbs together and adds richness and moisture. Vanilla buttercream or cream cheese frosting also work beautifully if you have either on hand.
Green candy melts: These are the key to that vivid Christmas-tree color. Candy melts (also sold as candy coating wafers) melt smoothly and set with a firm, slightly glossy shell. You’ll find them at craft stores, Walmart, Target, or online. Wilton is a widely available brand. If you can’t find green candy melts, white candy melts tinted with oil-based green food coloring work — but don’t use water-based food coloring, which can cause the coating to seize.
White chocolate chips: The drizzle adds a decorative finish and a second layer of sweetness. Regular white chocolate chips melt easily in the microwave. White candy melts also work and give a slightly more matte finish.
Sprinkles or edible glitter: The more festive the better. Christmas-themed sprinkle mixes, nonpareils, star-shaped candies, or edible glitter all look great. Add these immediately after dipping while the coating is still wet — they won’t stick once it sets.
Kitchen Tools You’ll Need
- 9×13 inch baking pan
- Large mixing bowl
- Baking sheet lined with parchment paper
- Microwave-safe bowl (for melting candy)
- Fork or dipping tool (for coating)
- Small piping bag or a zip-lock bag with a tiny corner snipped off (for the white chocolate drizzle)
Substitutions and Variations
Cake flavor swap: White cake is the classic base, but chocolate cake balls dipped in green coating look equally festive and have a richer flavor. Funfetti cake adds colorful little specks throughout.
Frosting swap: Cream cheese frosting in place of white frosting adds a subtle tang that balances the sweetness. Use it 1:1.
Tree shapes: Instead of rolling the mixture into balls, mold it into small cone shapes before freezing. They look like little Christmas trees once coated and decorated, and the visual payoff is worth the extra few minutes of shaping.
Cake pop version: Insert a lollipop stick into each ball before the second freeze (dip the tip of the stick in melted candy first, push it in about halfway, then freeze 5 minutes before full dipping). This turns them into cake pops that stand upright in a styrofoam block or a holiday mug filled with sugar — great for a party display.
Holiday color swap: Use red and white candy melts for a candy-cane vibe, or blue and silver for a Hanukkah-friendly look.
Decorating extras: A tiny star-shaped candy pressed on top of each ball before the coating sets mimics a tree topper and looks absolutely charming.
How to Make Christmas Tree Cake Balls
Step-by-Step Instructions
- Bake the cake. Prepare and bake the white cake according to the box directions using a 9×13 inch pan. Let it cool completely — this is important; warm cake won’t crumble cleanly and will cause the mixture to be too loose.
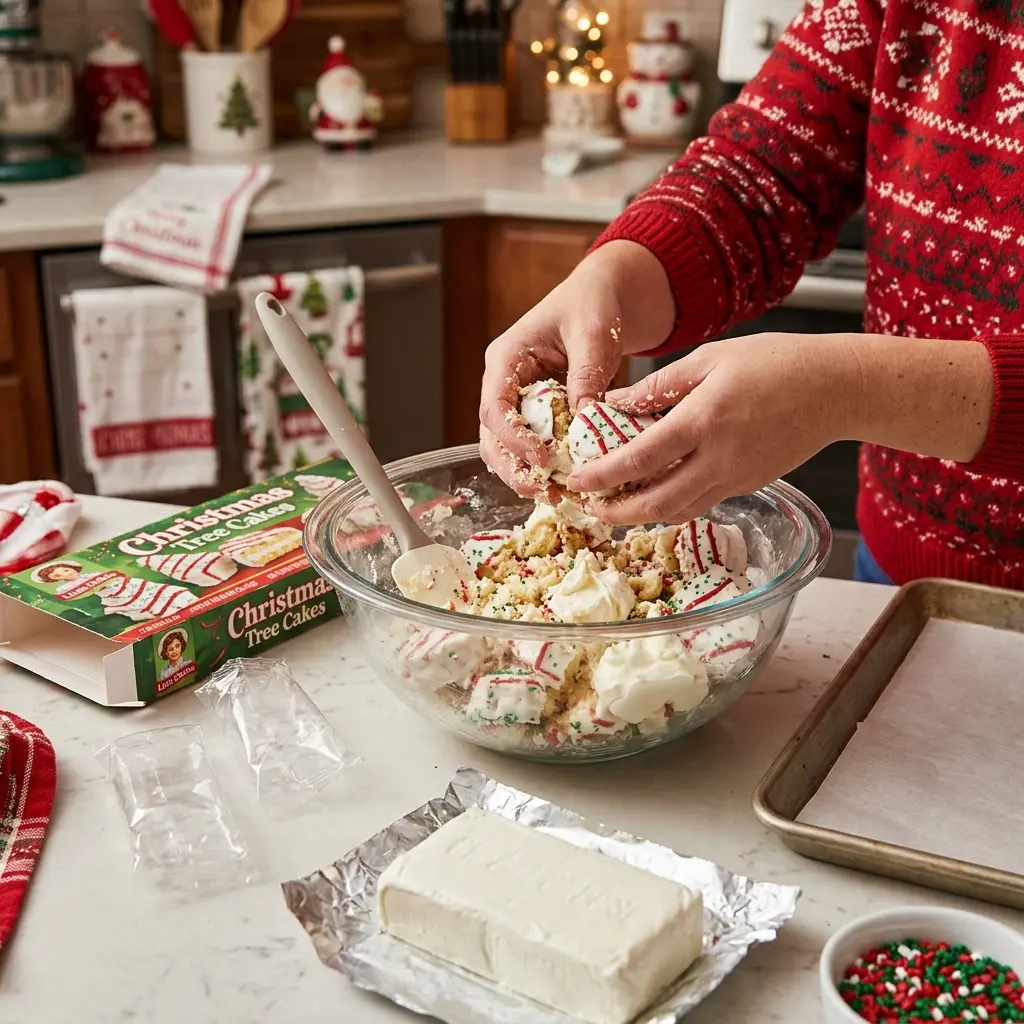
- Crumble the cake. Once fully cooled, break the cake into a large bowl and crumble it into fine crumbs using your hands or a fork. You want an even, fine texture with no large chunks.
- Mix in the frosting. Add 1 cup of white frosting to the crumbled cake and mix until combined. The mixture should hold together when pressed — moist but not sticky or wet. If it’s too dry, add a small additional spoonful of frosting.
- Roll into balls. Scoop about 1 to 1½ tablespoons of the mixture and roll it between your palms into a smooth ball. Place each ball on a parchment-lined baking sheet as you go.
- Freeze. Place the tray in the freezer for 30 minutes. This firms the balls up so they hold their shape during dipping and don’t fall apart in the warm candy coating.
- Melt the green candy melts. Place the green candy melts in a microwave-safe bowl. Microwave in 30-second intervals, stirring between each, until fully melted and smooth. Don’t overheat — candy melts can scorch and become lumpy. If the coating is too thick, add a teaspoon of coconut oil or vegetable shortening and stir until it thins out.
- Dip each ball. Working one at a time, drop a frozen cake ball into the melted candy coating. Use a fork or a dipping tool to roll it around and lift it out, tapping the fork gently against the side of the bowl to let the excess coating drip off. Place each coated ball back on the parchment-lined tray.
- Decorate immediately. While the coating is still wet, add sprinkles, edible glitter, or a star candy on top. Work quickly — the coating sets fast, especially with cold balls fresh from the freezer.
- Add the white chocolate drizzle. Melt the white chocolate chips in the microwave in 30-second intervals, stirring until smooth. Transfer to a small piping bag or a zip-lock bag with a tiny corner snipped off and drizzle over the set cake balls in a back-and-forth motion.
- Let set completely. Allow the balls to sit at room temperature until the coating and drizzle are fully set before transferring to a serving plate or storage container. This takes about 10–15 minutes at room temperature, or you can speed it up by returning them to the fridge for a few minutes.
Tips for Success
- Cool the cake completely before crumbling. If there’s any warmth left in the cake, the mixture will be too soft and sticky to roll cleanly.
- Don’t skip the freeze. Thirty minutes in the freezer makes a huge difference. Cold, firm cake balls dip more cleanly and the coating sets faster and more evenly around them.
- Add coconut oil if the coating is too thick. A teaspoon of refined coconut oil (or vegetable shortening) stirred into the melted candy melts thins the coating just enough to dip smoothly without adding flavor.
- Work in small batches. Melt the candy coating in two or three batches rather than all at once if it starts to thicken as it cools. You can re-warm it in 15-second microwave bursts.
- Add sprinkles one ball at a time. Don’t dip a whole tray and then go back to sprinkle — by the time you reach the last ball, the coating on the first ones will already be set.
- Use a shallow bowl for dipping. A wide, shallow bowl gives you more room to maneuver the fork and tap off excess coating cleanly.
How to Know They’re Done
The cake balls are ready to eat once the green candy coating is fully opaque and set firm — it should feel smooth and hard to the touch, not tacky or soft. The white chocolate drizzle should also be set and matte rather than glossy and wet. If you press gently on one and it leaves an indent, give them a few more minutes to set fully.
What to Serve With Them
Christmas tree cake balls are a natural fit for any holiday dessert table alongside other festive bites. Try them with Orange Clove Christmas Cookies or Chocolate Peppermint Crunch Cookies for a full holiday cookie spread. They’re also great on a hot cocoa bar — guests can grab a ball or two alongside their mug. For a showstopper party display, stand the lollipop-stick version upright in a styrofoam cone wrapped in ribbon for an edible Christmas tree centerpiece.
Storage Instructions
Store finished Christmas tree cake balls in an airtight container in the refrigerator for up to 1 week. Layer them between sheets of parchment or wax paper to prevent sticking. Let them sit at room temperature for 10–15 minutes before serving — the candy coating softens slightly and the cake inside comes back to its full tender texture.
Freezing Instructions
Finished, fully coated and decorated cake balls freeze beautifully. Place them in a single layer on a parchment-lined tray and freeze until solid, about 1 hour. Then transfer to a zip-lock freezer bag or airtight container, layered with parchment paper. They’ll keep well for up to 6 weeks. Thaw overnight in the refrigerator or for about 30 minutes at room temperature before serving. The candy coating holds up well through the freeze-thaw cycle and won’t crack or separate.
You can also freeze the uncoated, undipped cake balls at the rolling stage — after the 30-minute freeze, transfer them to a freezer bag and store for up to 6 weeks. Thaw them in the fridge overnight before proceeding with the coating and decorating steps.
Common Mistakes
Adding too much frosting. The most common issue with cake balls is a mixture that’s too wet and sticky to roll. Add frosting gradually — start with ¾ cup, mix, and only add more if the mixture doesn’t hold together when pressed. Once it clumps and rolls cleanly, stop.
Skipping the freeze before dipping. Soft cake balls will crack, sink, or fall apart in warm candy coating. The freeze is non-negotiable for clean results.
Using water-based food coloring in candy melts. Even a drop of water-based coloring can cause candy melts to seize and become thick and grainy. Use oil-based food coloring if you’re tinting white coating yourself, or just buy pre-colored green candy melts.
Overheating the candy coating. Candy melts are sensitive to heat. Microwaving in bursts and stirring between each is the right approach. A scorched batch will be grainy and lumpy and can’t be salvaged — better to melt slowly than to rush it.
Waiting too long to add sprinkles. The coating sets quickly, especially on cold cake balls. Have your sprinkles and decorations ready before you start dipping so you can add them immediately after each ball comes out of the coating.
Skipping the tap to remove excess coating. If you don’t tap off the excess, the balls will pool at the bottom as the coating sets, leaving a thick, uneven “foot.” Tap the fork gently against the bowl rim after lifting each ball out.
About Christmas Tree Cake Balls
Cake balls — sometimes called cake truffles — became a popular home baking trend in the mid-2000s, when bakers discovered that crumbled cake bound with frosting could be shaped, dipped, and decorated much like a chocolate truffle. The basic concept is brilliant in its simplicity: it transforms any leftover or slightly overbaked cake into something that looks intentional and elegant. The candy coating shell gives you the satisfying snap of a chocolate bonbon without any tempering, and the filling is endlessly adaptable to whatever flavor combination you love.
The Christmas tree version leans into the season with green candy coating and festive decoration, making them one of the most visually distinctive treats in the holiday baking repertoire. They photograph beautifully, travel well in tins and boxes, and hold up better at room temperature than most glazed cookies — which makes them a practical choice for cookie swaps and gift boxes as well as a fun one.
The recipe at its core is also very forgiving. Unlike layer cakes or delicate pastries, cake balls have almost no structural demands — the shape doesn’t need to be perfect, and small imperfections in the coating get covered up by sprinkles and drizzle. That’s part of their charm: they’re a project where the process is genuinely enjoyable and the results look impressive even when you’re a first-time baker.
Frequently Asked Questions
Can I use a different flavor of cake mix?
Yes. Yellow cake, funfetti, and even chocolate cake all work well as the base. Chocolate cake balls with green candy coating have a beautiful contrast in flavor — rich and slightly bitter against the sweet coating — and look just as festive.
Can I make these without a box mix?
Absolutely. Any white or vanilla cake baked from scratch works perfectly. You need about the same amount of crumbled cake as a standard box mix produces — roughly 8–9 cups of loose crumbs. Use your favorite homemade vanilla cake recipe.
Why did my candy coating turn out lumpy?
The most common causes are overheating and moisture. Microwave in short bursts and stir between each. Make sure your bowl and fork are completely dry — even a drop of water can cause candy melts to seize. If the coating is lumpy, try stirring in a teaspoon of coconut oil. If it’s truly seized and grainy, unfortunately it will need to be discarded and a fresh batch started.
Can I add food coloring to white candy melts instead of buying green?
Yes, but you must use oil-based or powdered food coloring, never water-based. Water causes the candy to seize. Start with a small amount and stir until you reach the shade you want — a little goes a long way.
How far in advance can I make these?
You can make and refrigerate finished cake balls up to 5–7 days ahead. For longer storage, freeze them (see the Freezing section above). They’re one of the best make-ahead holiday treats precisely because they improve slightly after a day in the fridge — the coating firms up and the inside softens even further.
Why are my cake balls cracking after dipping?
Cracking usually happens when the cake balls are too cold going into the coating — either the coating is too warm or the balls are too frozen. Let the frozen balls sit at room temperature for just 3–4 minutes before dipping so the temperature difference between the ball and the coating isn’t too extreme. Very slight surface cracking is normal as the coating contracts slightly on cooling; deep cracks usually mean the ball was too cold.
Can I make these without a freezer?
You can refrigerate the rolled balls for 1–2 hours instead of freezing for 30 minutes. They won’t be quite as firm going into the coating, so work quickly and return each dipped ball to the fridge immediately rather than leaving them at room temperature.
Conclusion
Christmas tree cake balls are one of those holiday recipes that earns a permanent spot in your seasonal rotation. They’re simple enough for a weeknight but special enough for a party spread, and they check every box: festive, delicious, easy to make ahead, and genuinely fun to put together. Once you make them once, you’ll find yourself coming back to this formula year after year — varying the cake flavor, the coating color, the sprinkle situation — because the basic method is just that reliable.
Give them a try this holiday season, and happy baking!
More Delicious Recipes You’ll Love
- Raspberry Cheesecake Balls
- Irresistible Chocolate Crunch Balls
- Christmas Scones
- Orange Clove Christmas Cookies
- Cinnamon Sugar Snowball Cookies
Save It for Later on Pinterest
Love this recipe? Save it to your holiday baking boards and follow @PoulefRecipe on Pinterest for more festive treats: pinterest.com/poulefrecipe
Made These? Let Us Know!
Did you make these Christmas tree cake balls? Drop a comment below and tell us how they turned out! Did you shape them into cones? Use a different cake flavor? We’d love to hear your spin on this holiday classic.
Nutritional Information
Nutrition will vary depending on the specific cake mix, frosting, and candy coating brands used. Values below are approximate per cake ball based on a yield of 24 balls.
| Nutrient | Amount per Serving (1 cake ball) |
|---|---|
| Calories | ~180 |
| Carbohydrates | ~27g |
| Fat | ~8g |
| Sugar | ~19g |
| Protein | ~1g |
Christmas Tree Cake Balls
- Total Time: 1 hour
- Yield: 24–30 cake balls 1x
Description
These Christmas tree cake balls are a festive holiday treat! Moist white cake crumbs are mixed with creamy frosting, shaped into balls, dipped in vibrant green candy coating, and decorated with white chocolate drizzle and festive sprinkles.
Ingredients
1 box white cake mix, plus ingredients listed on the package
1 cup white frosting
2 cups green candy melts
1/2 cup white chocolate chips or white candy melts
Sprinkles or edible glitter for decoration
Instructions
1. Bake the white cake according to the package directions in a 9×13-inch pan. Let it cool completely.
2. Crumble the cooled cake into fine crumbs in a large bowl.
3. Add 1 cup of white frosting and mix until the mixture holds together when pressed.
4. Roll the mixture into 1 to 1 1/2 tablespoon-sized balls and place them on a parchment-lined baking sheet.
5. Freeze for 30 minutes, or until firm.
6. Melt the green candy melts in a microwave-safe bowl in 30-second intervals, stirring between each interval until smooth.
7. Dip each cake ball into the melted coating, tap off any excess, and place it on parchment paper.
8. Immediately add sprinkles or edible glitter while the coating is still wet.
9. Melt the white chocolate chips in the microwave in 30-second intervals, stirring until smooth.
10. Drizzle the melted white chocolate over the coated cake balls.
11. Let the coating set completely before serving, about 10 to 15 minutes at room temperature.
Notes
For a Christmas tree shape, mold the cake mixture into small cones before freezing instead of rolling it into balls.
If the candy coating is too thick, stir in 1 teaspoon of refined coconut oil to thin it.
Work with one cake ball at a time when adding sprinkles because the coating sets quickly on cold cake balls.
Store in an airtight container in the refrigerator for up to 1 week.
Freeze the finished cake balls for up to 6 weeks and thaw overnight in the refrigerator.
- Prep Time: 30 minutes
- Cook Time: 30 minutes
- Category: Dessert
- Method: Baking
- Cuisine: American
Nutrition
- Serving Size: 1 cake ball
- Calories: 180
- Sugar: 19g
- Fat: 8g
- Carbohydrates: 27g
- Protein: 1g
Table of Contents

Gianna Poulef
I’m Gianna Poulef from Poulef Recipes. I love sharing perfected dishes from my kitchen. I’m sure they’ll earn a spot in your heart. Let’s savor this journey together!.
Let’s be friends!